

Introduction
In this guide I will show you exactly how to connect ChatGPT to WhatsApp using Quickchat AI.
With this setup you can create a custom WhatsApp chatbot powered by your own AI Agent that responds to customers instantly and works 24/7.
You will need:
- a Quickchat AI Agent (you can sign up for free)
- a WhatsApp Business phone number
- a Meta Business account
The integration takes only a few minutes and requires no coding.
Watch the Video Tutorial
Why connect ChatGPT to WhatsApp
More than 2 billion people use WhatsApp every month, which makes it one of the most effective channels for customer communication.
With Quickchat AI you can:
- provide instant responses to customers
- automate FAQs on WhatsApp
- route conversations to your team if needed
- qualify leads automatically
- give users a ChatGPT style experience inside WhatsApp
Your AI Agent becomes available on the channel your customers already love.
How the integration works
Once connected:
- A user sends a message to your WhatsApp Business number.
- Quickchat AI instantly forwards the message to your AI Agent.
- Your AI Agent responds using its knowledge, instructions, and tools.
- You see the full conversation inside the Quickchat AI Inbox.
 Your ChatGPT style AI Agent inside WhatsApp
Follow the steps below to set everything up.
Step 0: Prerequisites
Before you start, make sure you have:
- A WhatsApp Business phone number
- A Meta Business account
- Basic business details (name, website, country)
Step 1: Open the WhatsApp integration in Quickchat AI
- Log in to your Quickchat AI dashboard
- Go to External apps
- Open the WhatsApp integration module
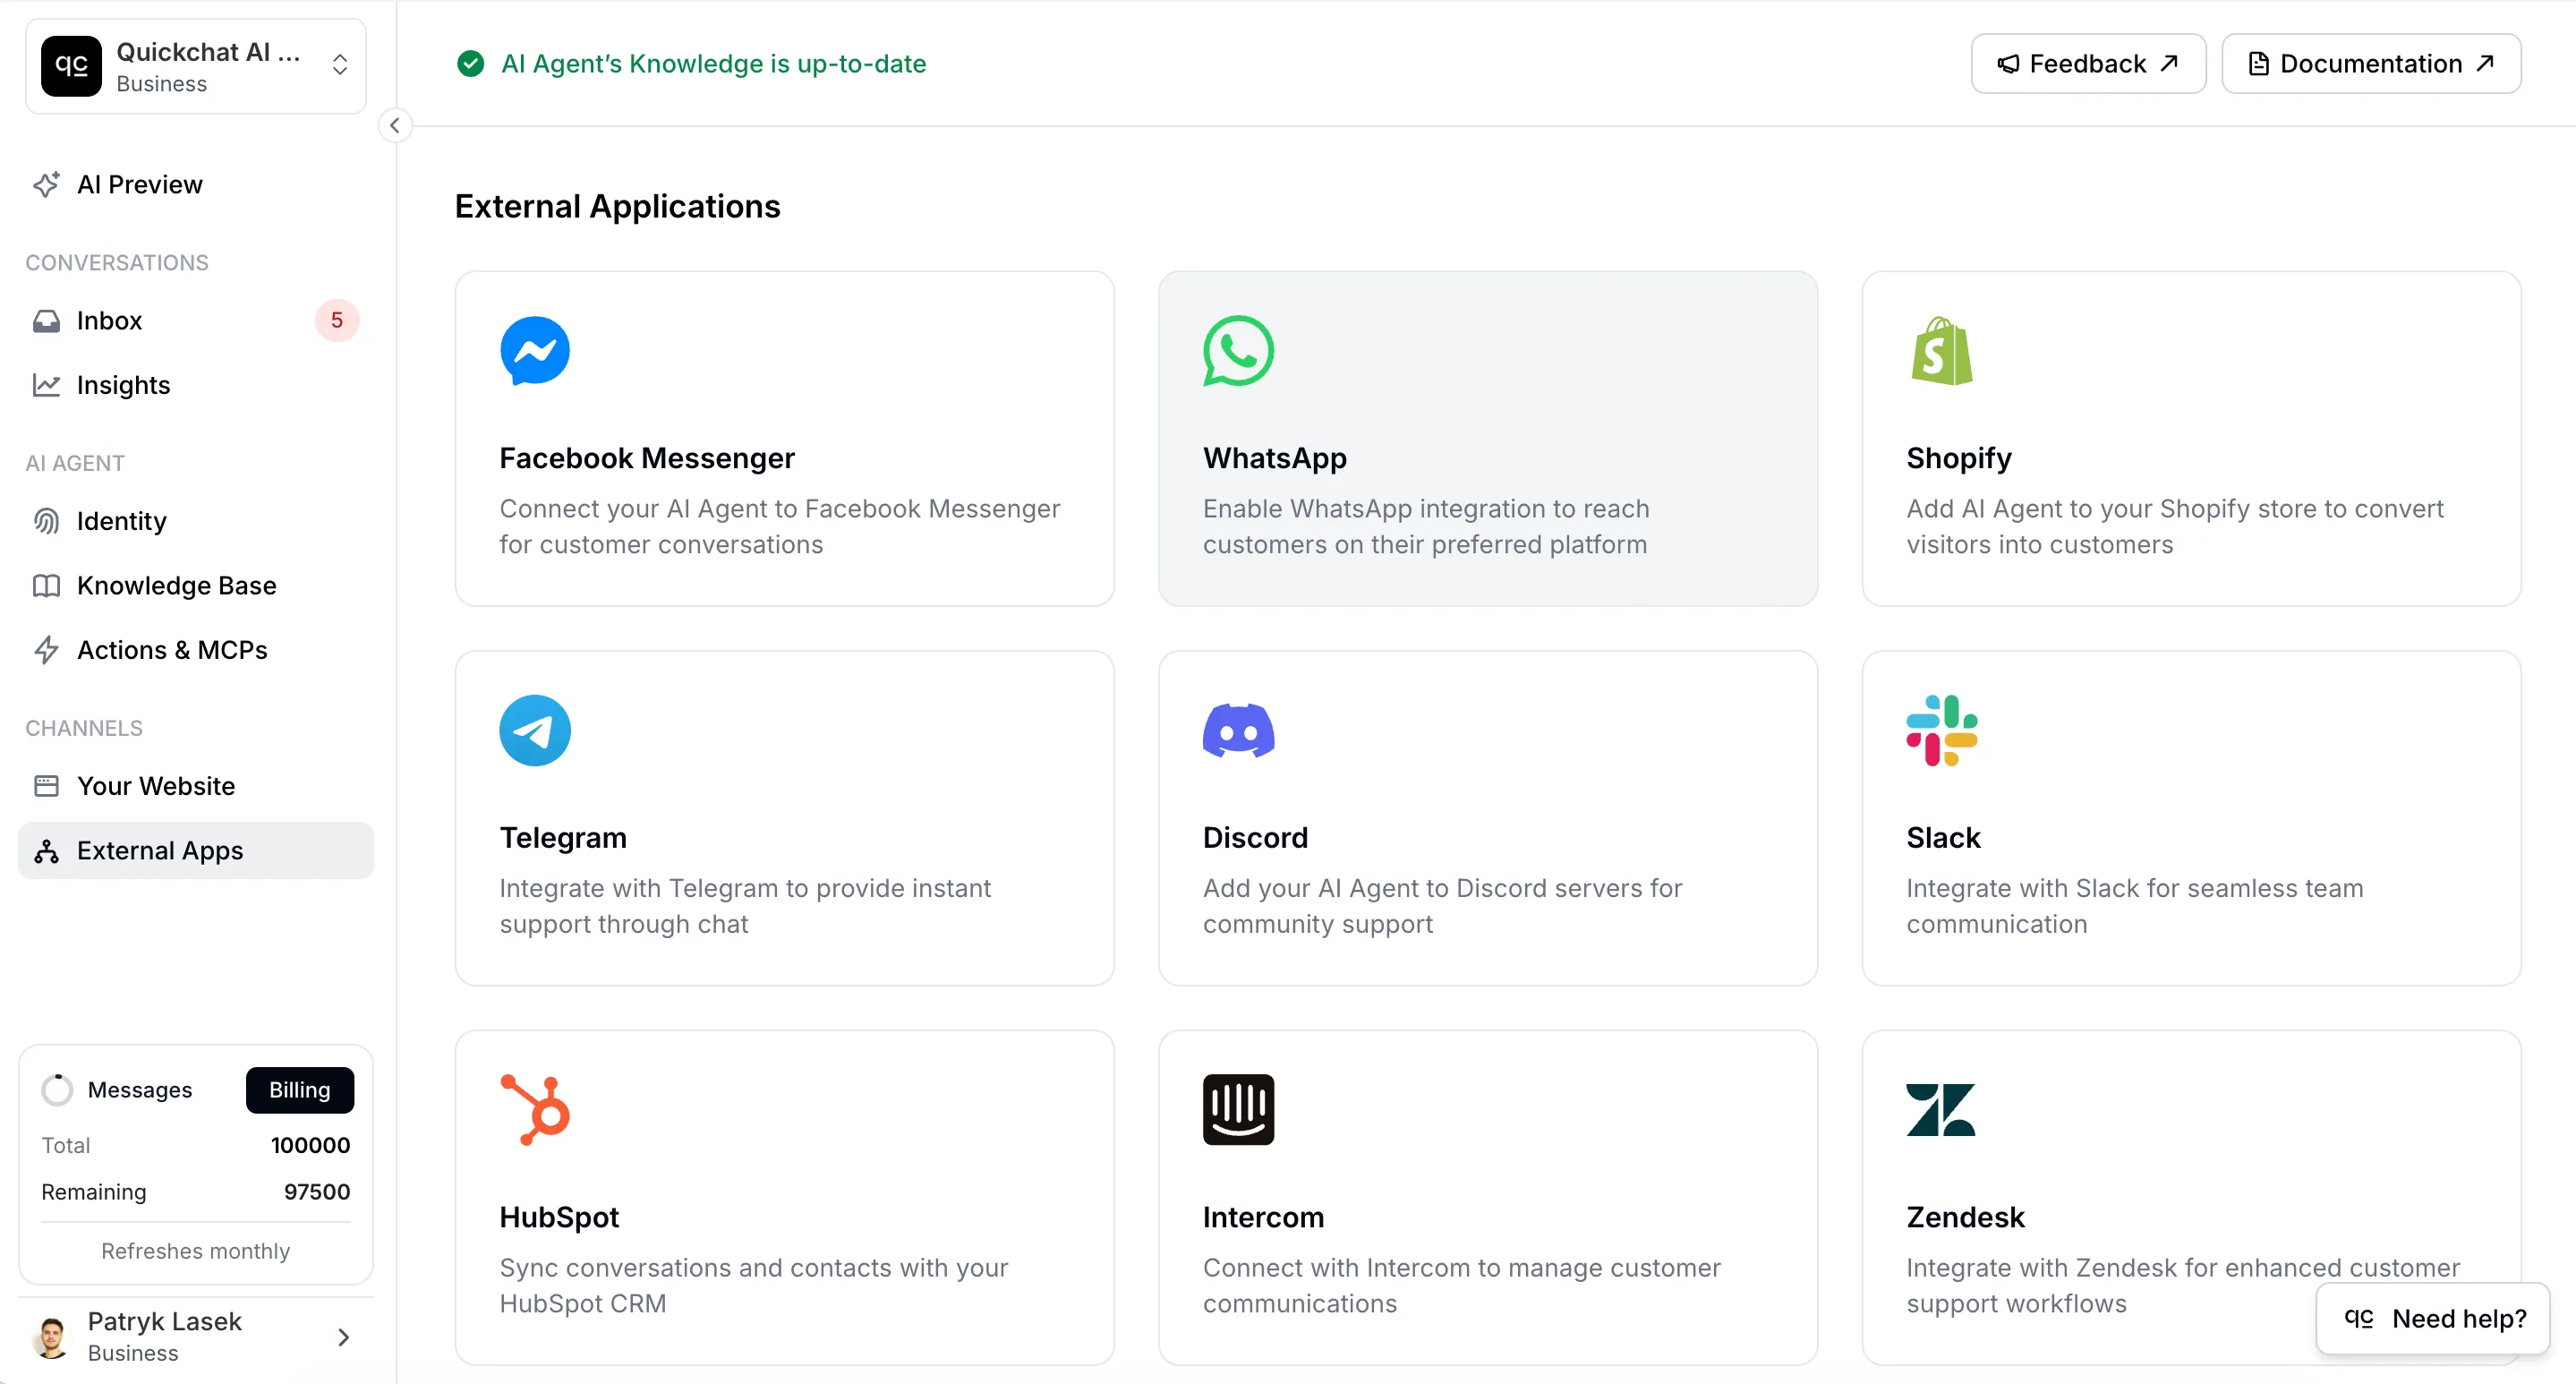 Open the WhatsApp module in Quickchat AI
 WhatsApp integration module in Quickchat AI
This is where the connection process begins.
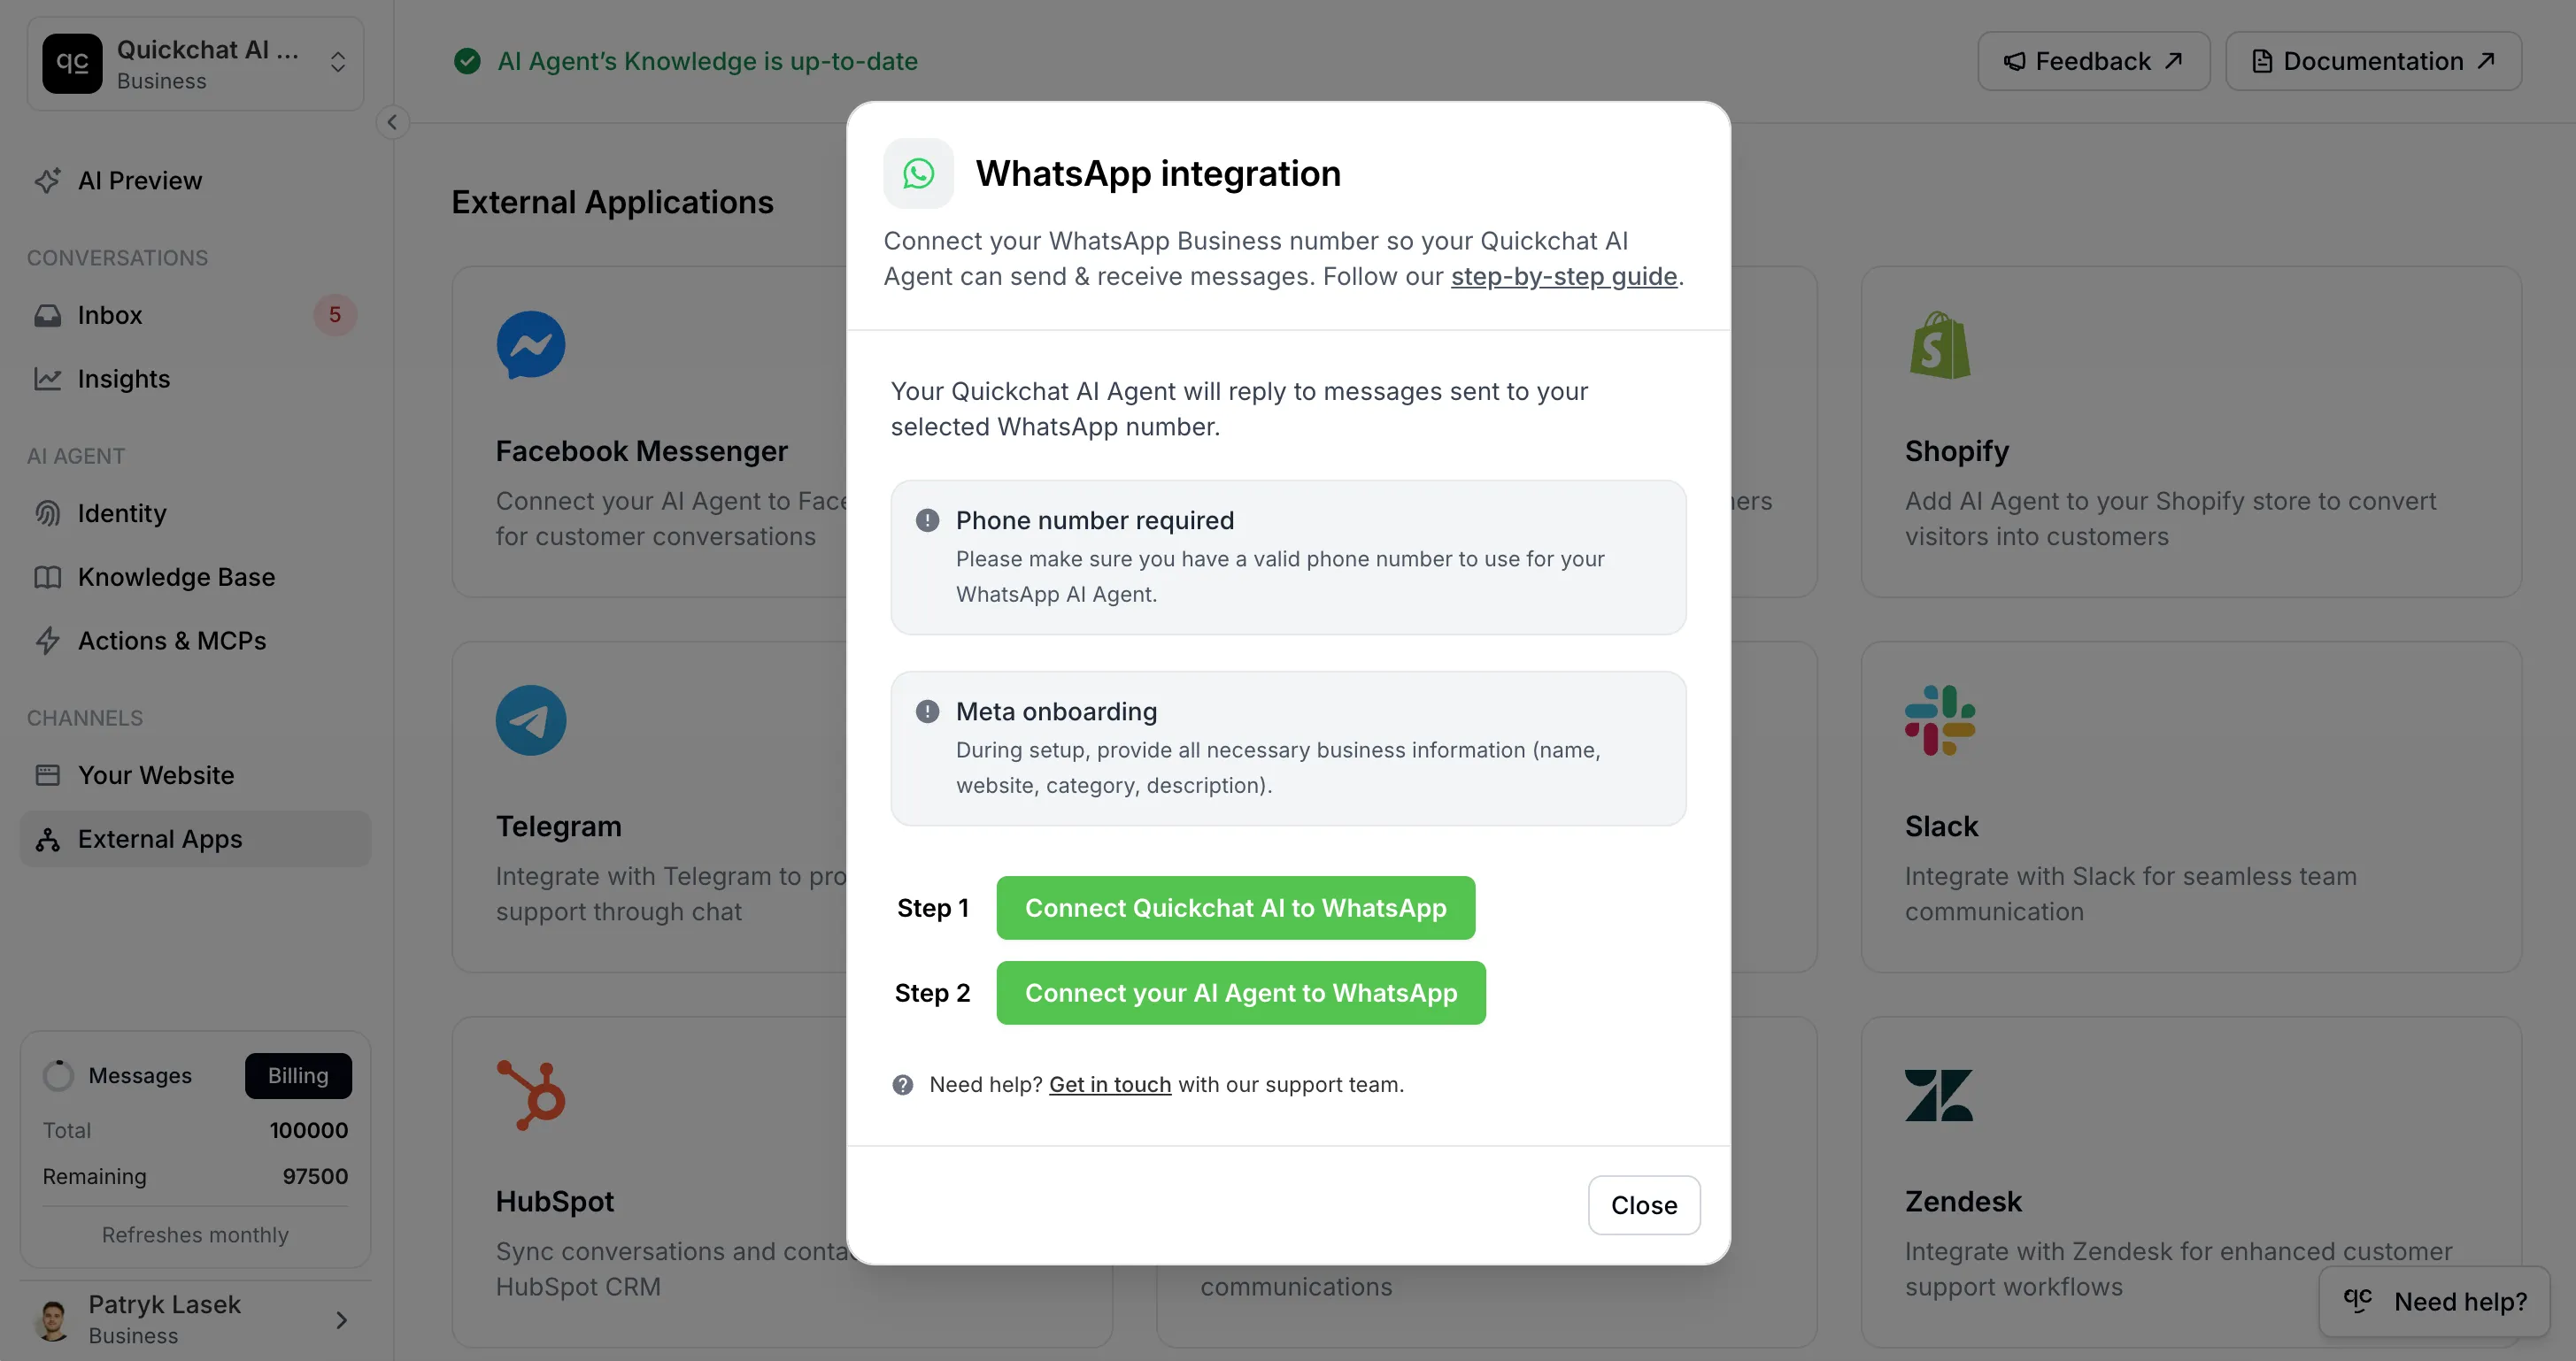
Step 2: Connect Quickchat AI to WhatsApp (Meta popup)
Click Connect Quickchat AI to WhatsApp. A Meta popup will appear.
- Log in with your Facebook (Meta) account
- Select the profile you want to connect
- Enter business details:
- Business name
- Business website
- Country
- Choose your Meta Business Account
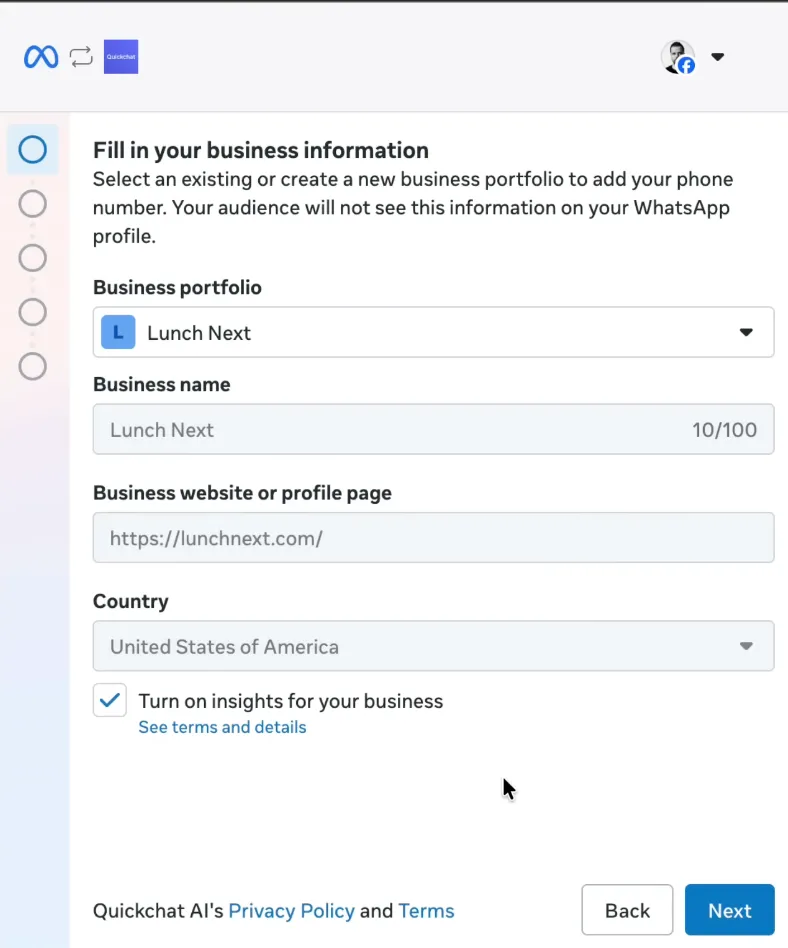 Select your Meta business account
Next, you will configure how your WhatsApp profile appears to users.
- Choose which WhatsApp Business Account you want to connect and click Next
- Enter your display name
- Choose your business category
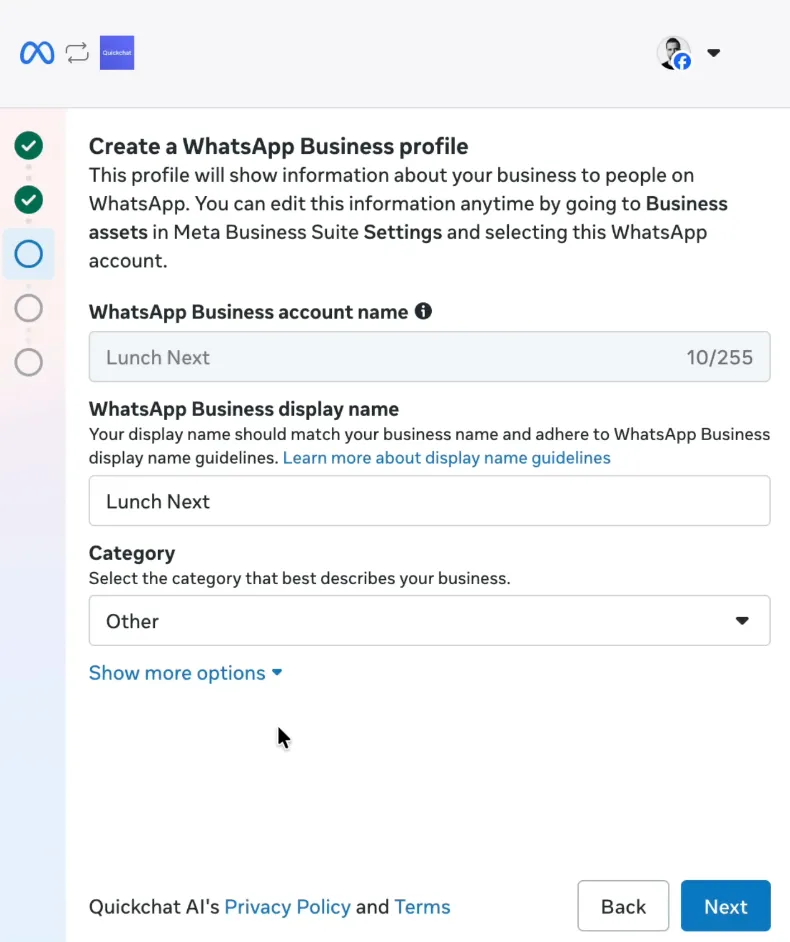 Your WhatsApp Business display name
Step 3: Add and verify your WhatsApp phone number
Now you will connect the number that customers will message.
- Click Add phone number
- Paste the number you plan to use
- Select SMS verification
- Enter the code that is sent to your number
You can use a number from services like Hushed.
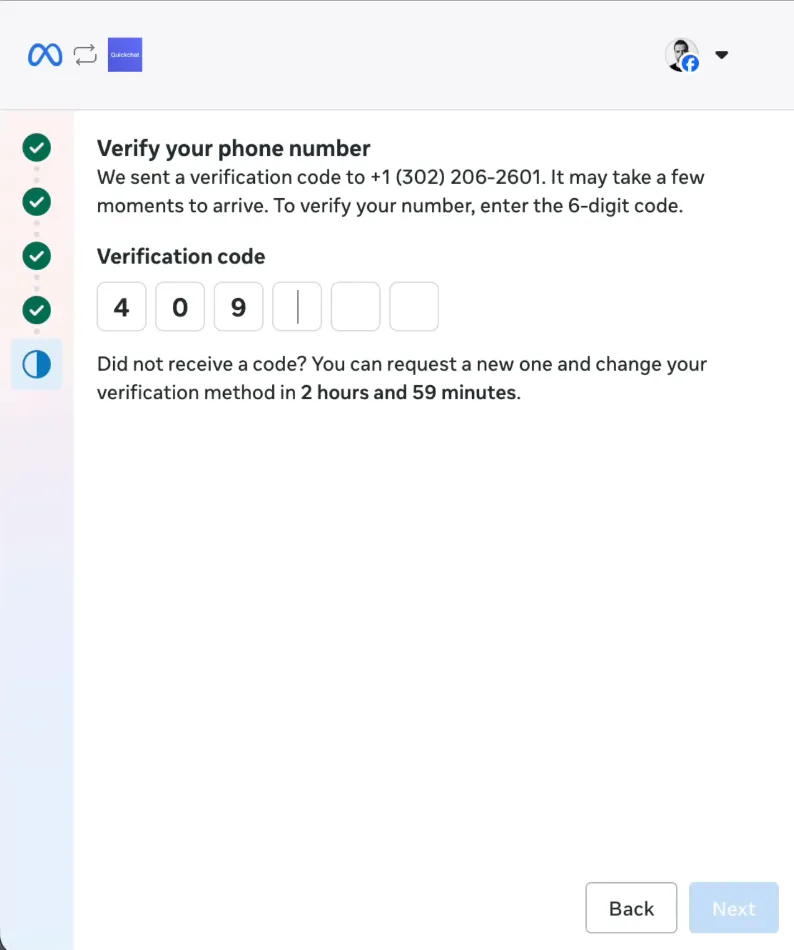 Verify the phone number used for your WhatsApp chatbot
Meta will now ask you to review access permissions. Click Confirm.
Step 4: Connect your AI Agent to WhatsApp
The second Meta popup connects your actual AI Agent to the WhatsApp number.
- Select the WhatsApp Business Account
- Approve Quickchat AI access
- Click Save
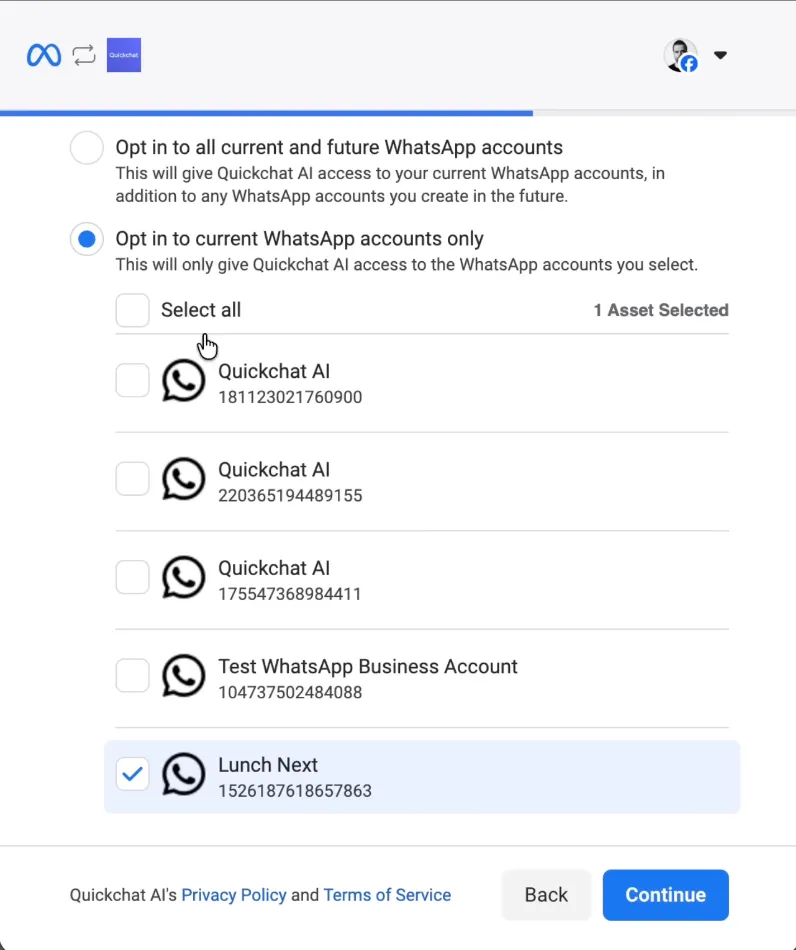 Select the WhatsApp Business Account
After a brief moment you will see a confirmation message that the integration is active.
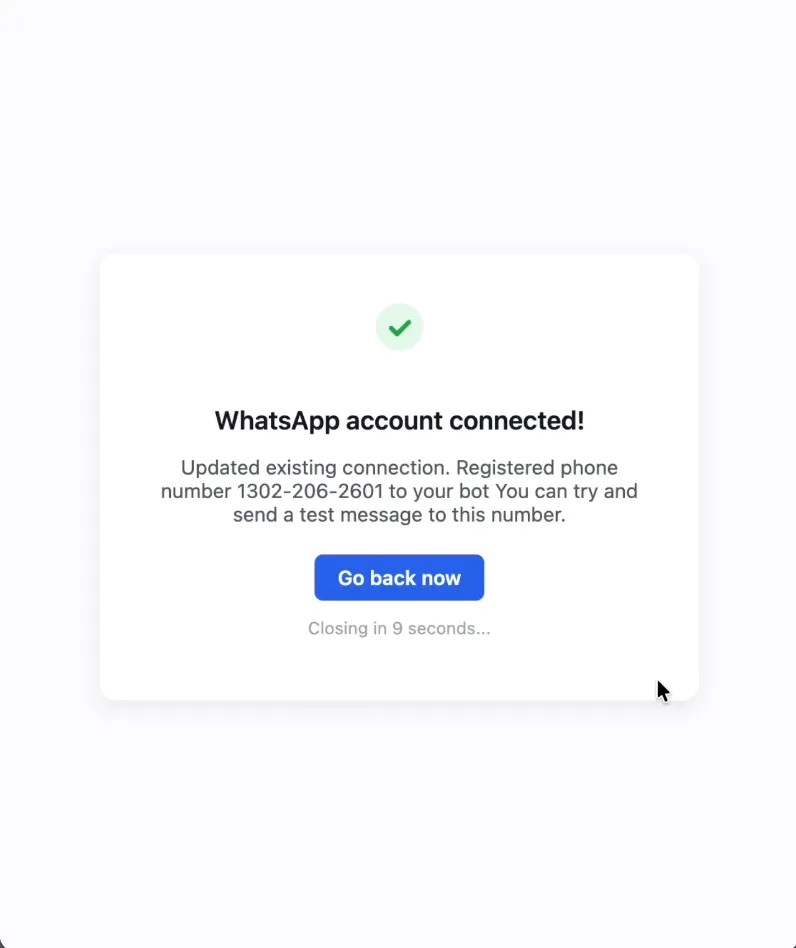 Your ChatGPT style WhatsApp bot is now connected
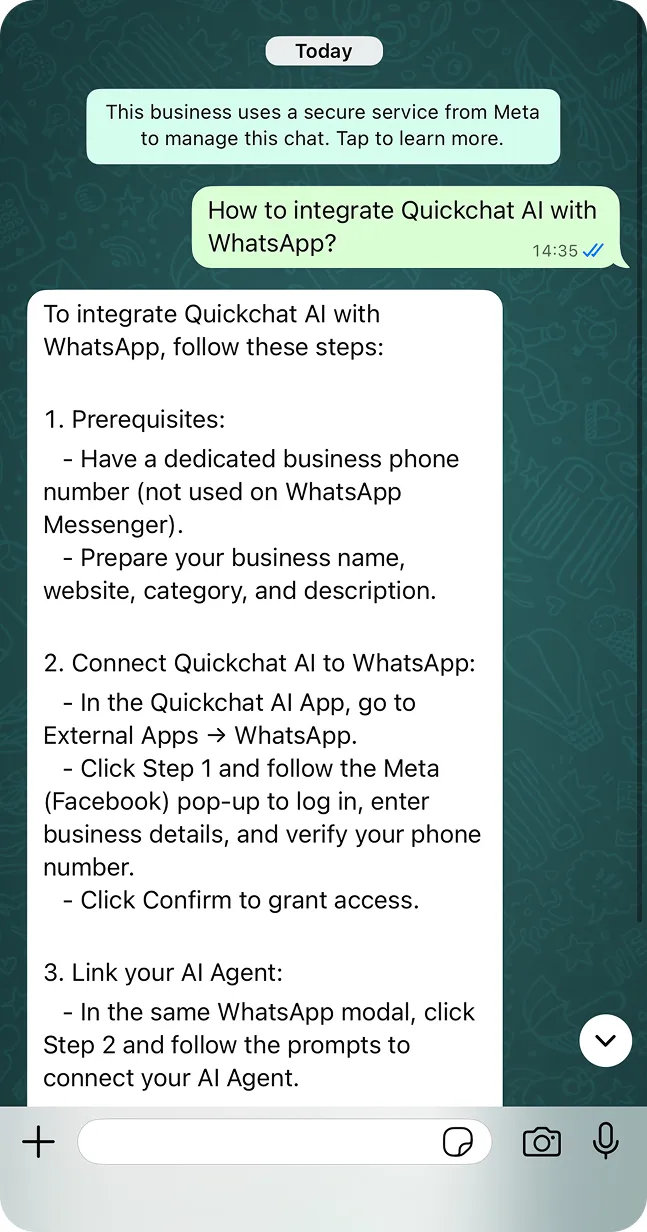
Step 5: Test your ChatGPT powered WhatsApp bot
Open WhatsApp on your phone and message your new AI number.
Example message: Hi, testing my WhatsApp chatbot.
Your Agent should reply instantly.
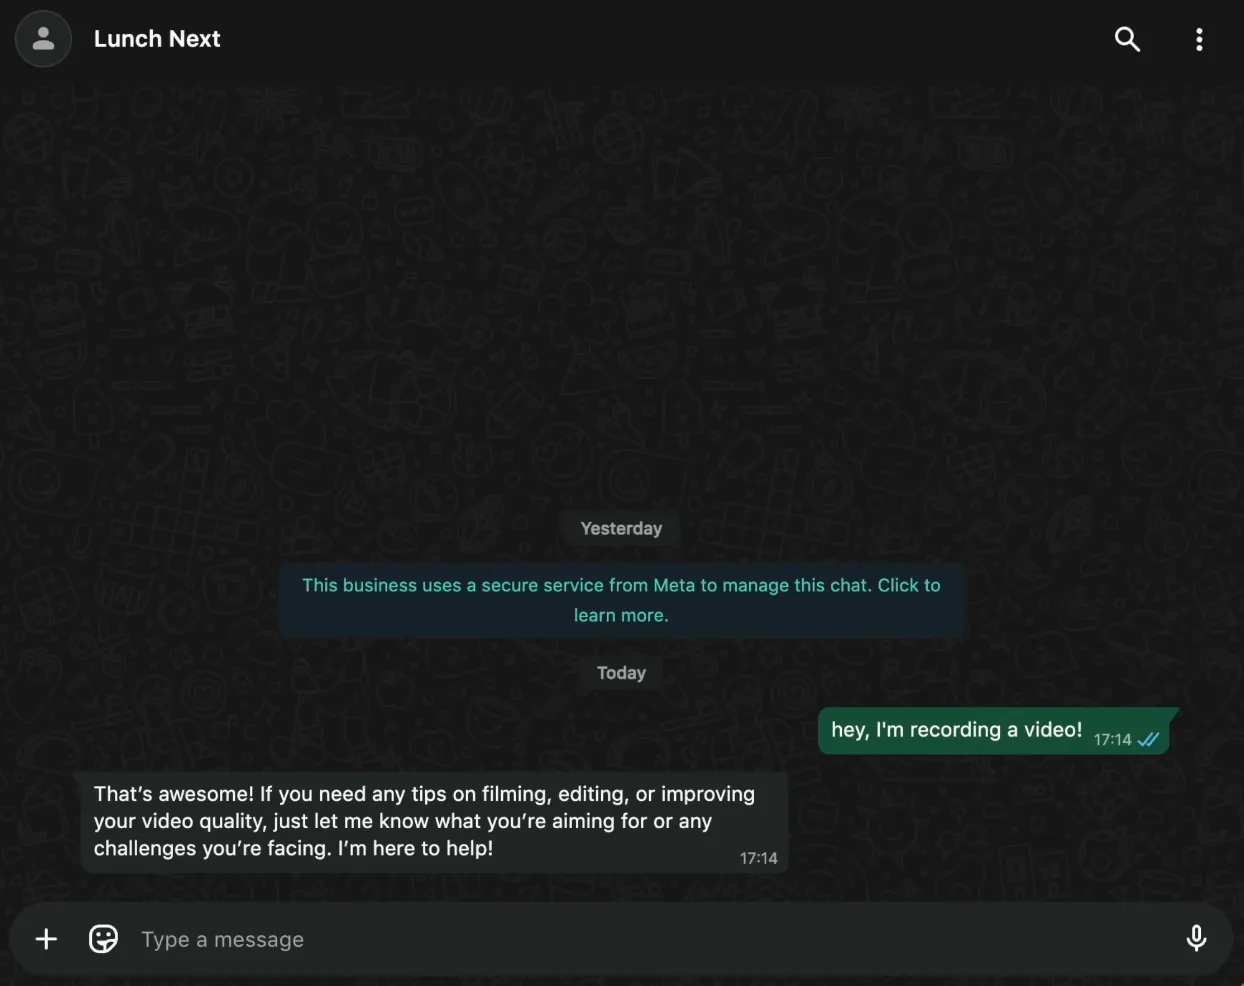 Test your ChatGPT like bot inside WhatsApp
You can open your Quickchat AI Inbox to see every message in real time.
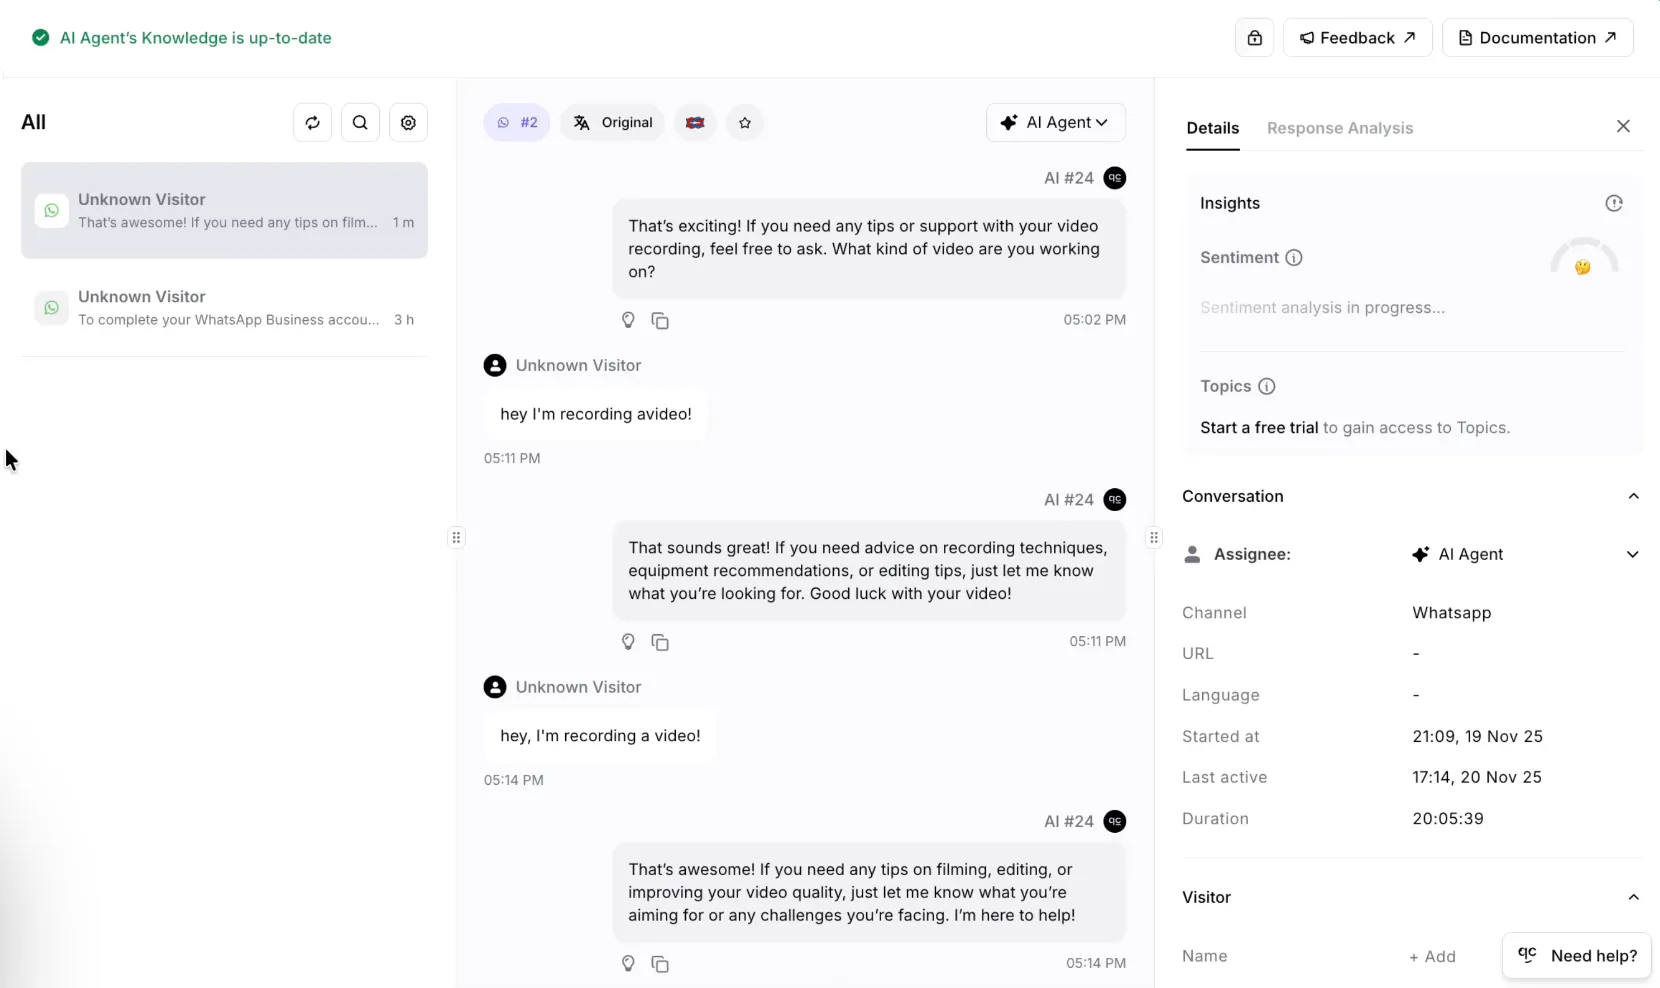 View all WhatsApp AI conversations inside Quickchat AI
Step 6: Complete recommended steps in WhatsApp Manager
When you connect your number, Meta sends a message with a link to the WhatsApp Manager.
Inside WhatsApp Manager you can:
- configure your business profile
- set your display name
- upload your profile photo
- manage business settings
- monitor quality rating
Completing these onboarding tasks helps keep your number in good standing.
Step 7: Create a WhatsApp link and QR code
This step makes it easy for users to start chatting with your AI Agent.
- Go to Message links in WhatsApp Manager
- Write a default message such as: “Hi”
- Generate your link and QR code
- Share it on your website or social media
Chat with Quickchat's Support AI on WhatsApp:
📱 +1 302-405-9992 — Start a chat
 Give customers a direct link to your WhatsApp AI Agent
Summary
You have successfully connected ChatGPT to WhatsApp using Quickchat AI.
Your WhatsApp chatbot is now live and ready to respond to customers instantly.
In this guide you learned how to:
- set up a WhatsApp Business number
- connect it to Quickchat AI
- approve all required Meta permissions
- test your ChatGPT style WhatsApp bot
- configure extra settings in WhatsApp Manager
This is one of the easiest and most powerful ways to offer AI assistance where your customers spend most of their time.
Bonus: expand to more channels
With Quickchat AI you can connect your AI Agent not only to WhatsApp but also to:
- website chat widgets
- Messenger
- Slack
- custom APIs
- and more
Explore all channels here: