
In our previous guide, we showed you how to create an AI chatbot for HubSpot and deploy it as a conversational assistant on your HubSpot live chat. That setup lets your AI Agent answer questions, qualify leads, and hand off to human agents.
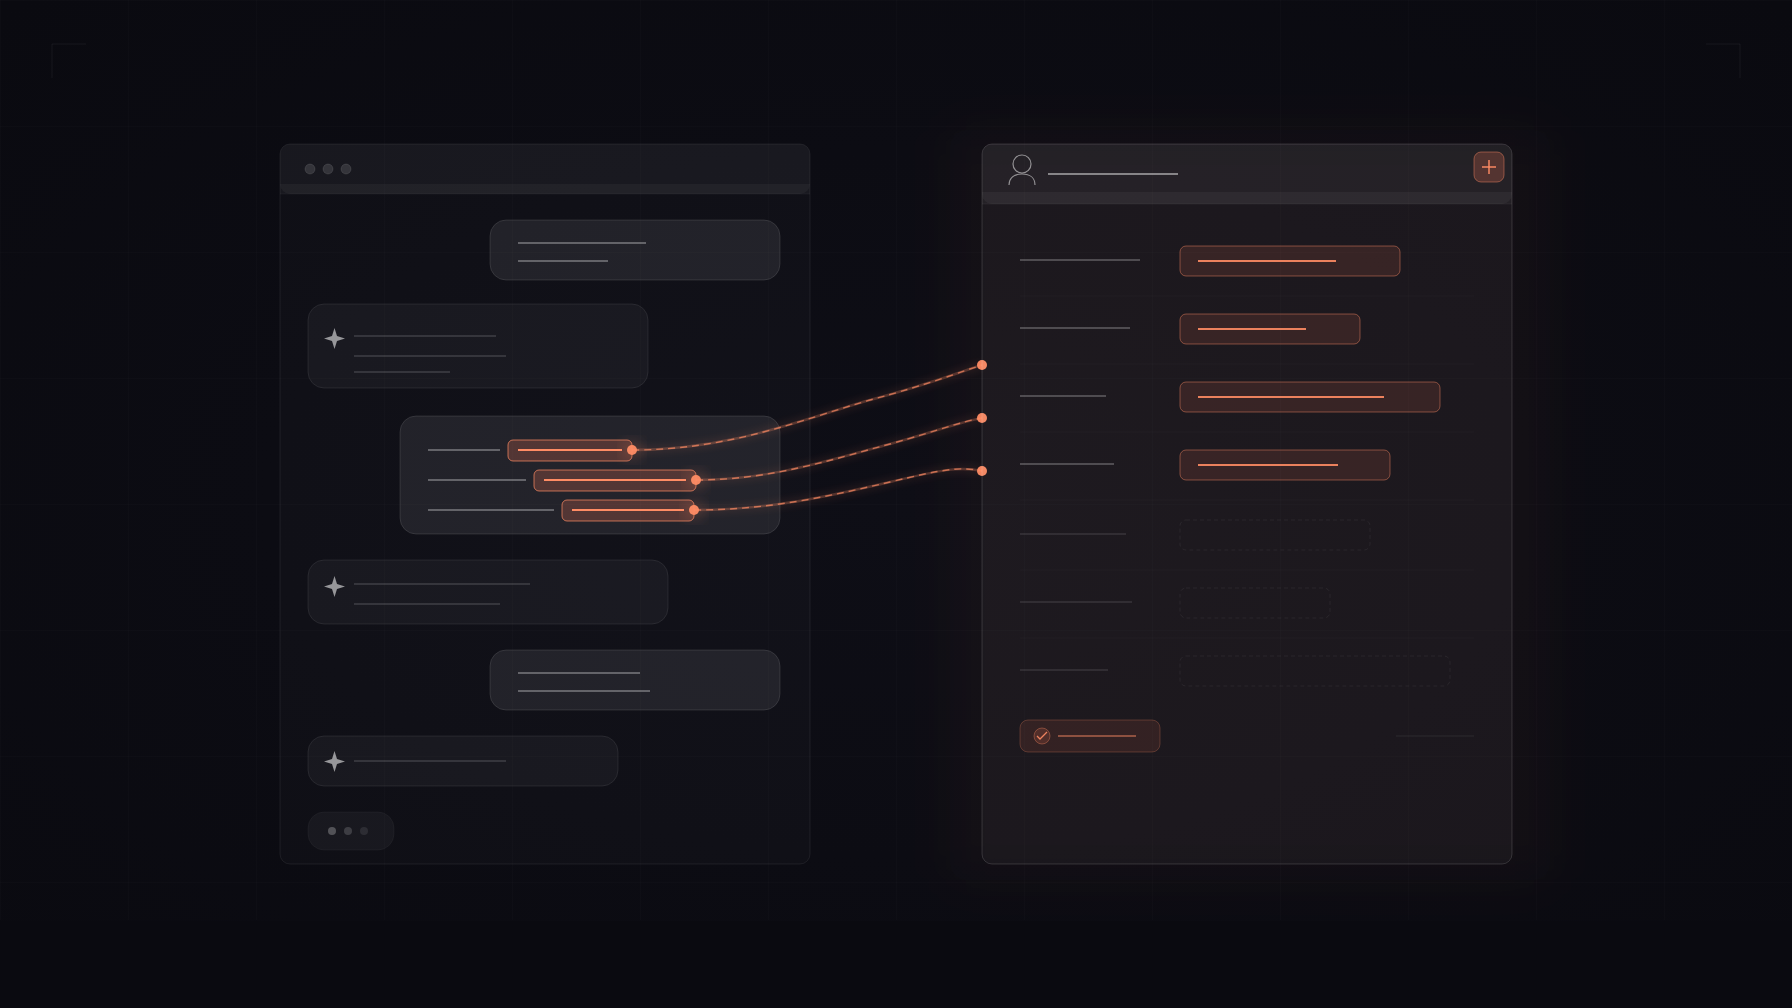
HubSpot AI Actions extend this by letting the AI Agent perform CRM operations during live conversations: creating contacts, opening deals, filing support tickets, searching records, and updating existing data. No custom code required.
This guide covers setup, configuration, and testing for each action type.
What Are AI Actions?
AI Actions let your AI Agent call external APIs during conversations. For HubSpot, this means saving a lead’s contact info, creating a support ticket when a customer reports an issue, or updating deal stages directly from the chat.
With HubSpot AI Actions, you get pre-built templates for the most common CRM operations:
| Category | Actions |
|---|---|
| Contacts | Create Contact, Update Contact, Search Contacts |
| Deals | Create Deal, Update Deal |
| Tickets | Create Ticket |
You can also start from scratch and build a fully custom HubSpot action using any HubSpot API endpoint.
Prerequisites
Before you begin, make sure you have:
- A Quickchat AI account with an AI Agent set up
- A HubSpot account with admin access
- Your AI Agent connected to HubSpot (follow our HubSpot integration guide if you haven’t done this yet)
Step 1: Connect HubSpot to Your AI Agent
- Log in to your Quickchat AI dashboard.
- Select your AI Agent from the sidebar.
- Navigate to Integrations and find the HubSpot section.
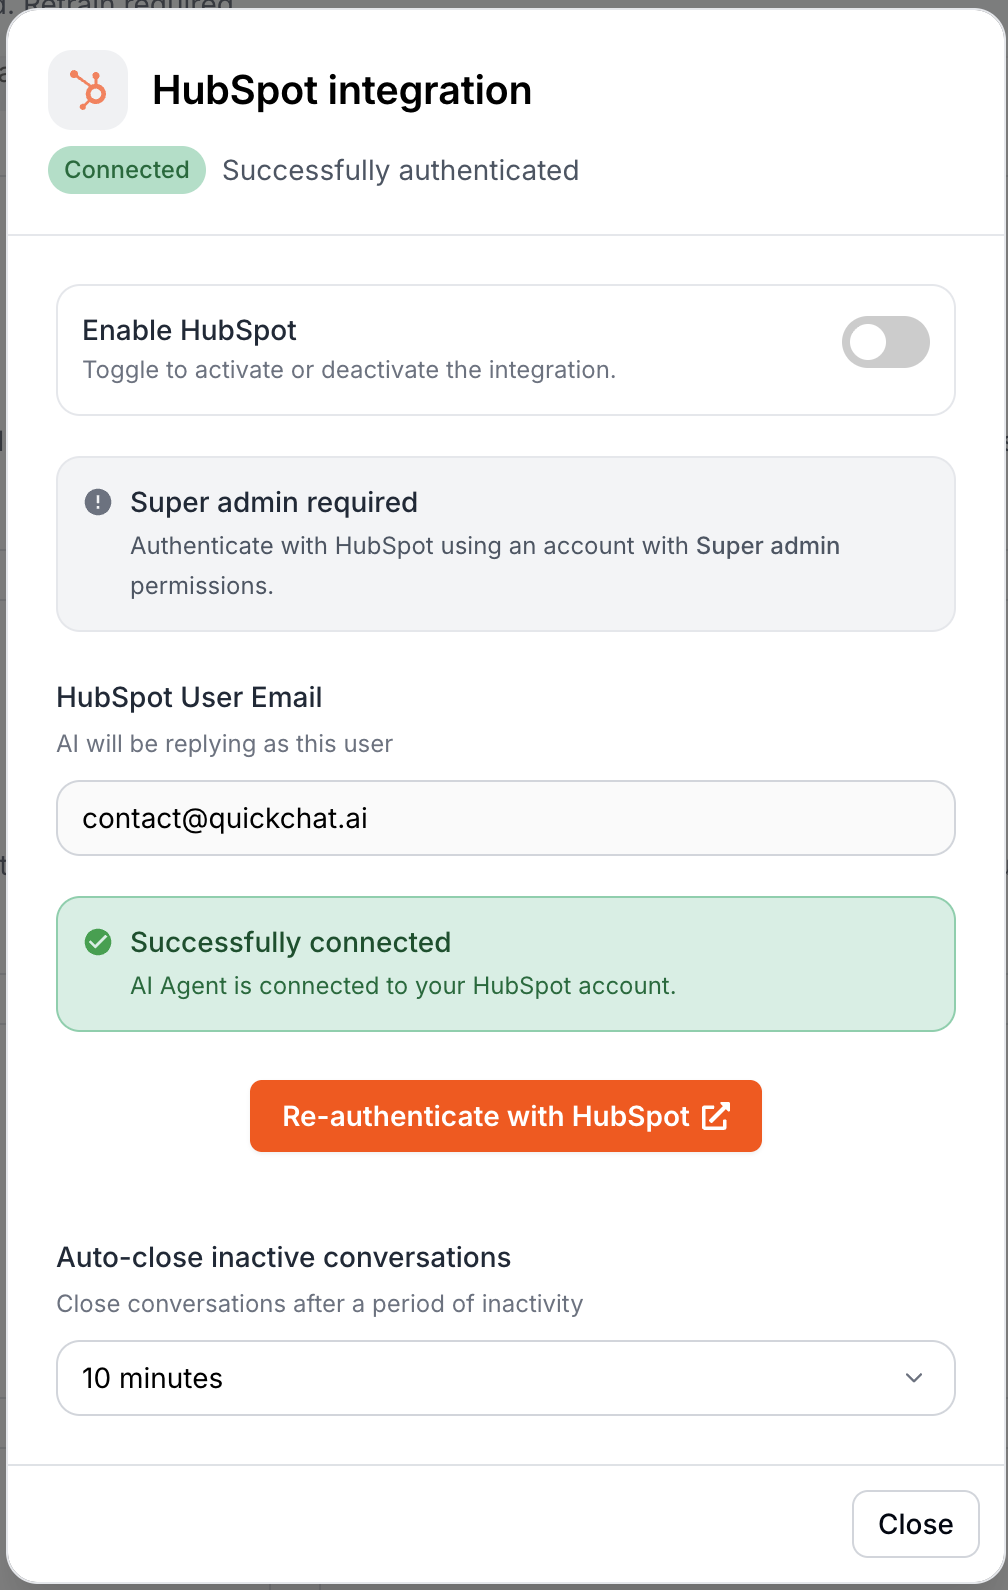
- Click Connect and authorize Quickchat AI to access your HubSpot account. You’ll be redirected to HubSpot’s OAuth consent screen.
- Review the requested permissions and click Grant access.
Once connected, you’ll see a confirmation that your HubSpot account is linked.
Note: Your HubSpot credentials are never exposed to the AI model. OAuth tokens are stored encrypted and refreshed automatically before each API call, so you do not need to re-authorize unless you revoke access from HubSpot’s side.
What permissions are requested
During the OAuth flow, Quickchat AI requests the following HubSpot scopes:
| Scope | Purpose |
|---|---|
crm.objects.contacts.read | Read contact records |
crm.objects.contacts.write | Create and update contacts |
crm.objects.deals.read | Read deal records |
crm.objects.deals.write | Create and update deals |
conversations.read | Read conversation data |
conversations.write | Write to conversations |
tickets | Create and manage tickets |
settings.users.read | Read user settings (for handoff routing) |
These are the minimum scopes needed for all HubSpot AI Action templates. If you build a custom action that requires additional scopes (e.g., crm.objects.companies.write), you may need to re-authorize.
Step 2: Open the HubSpot AI Actions Gallery
- In your AI Agent settings, go to Actions in the left sidebar.
- Click + Add Action.
- Select HubSpot from the action type options.
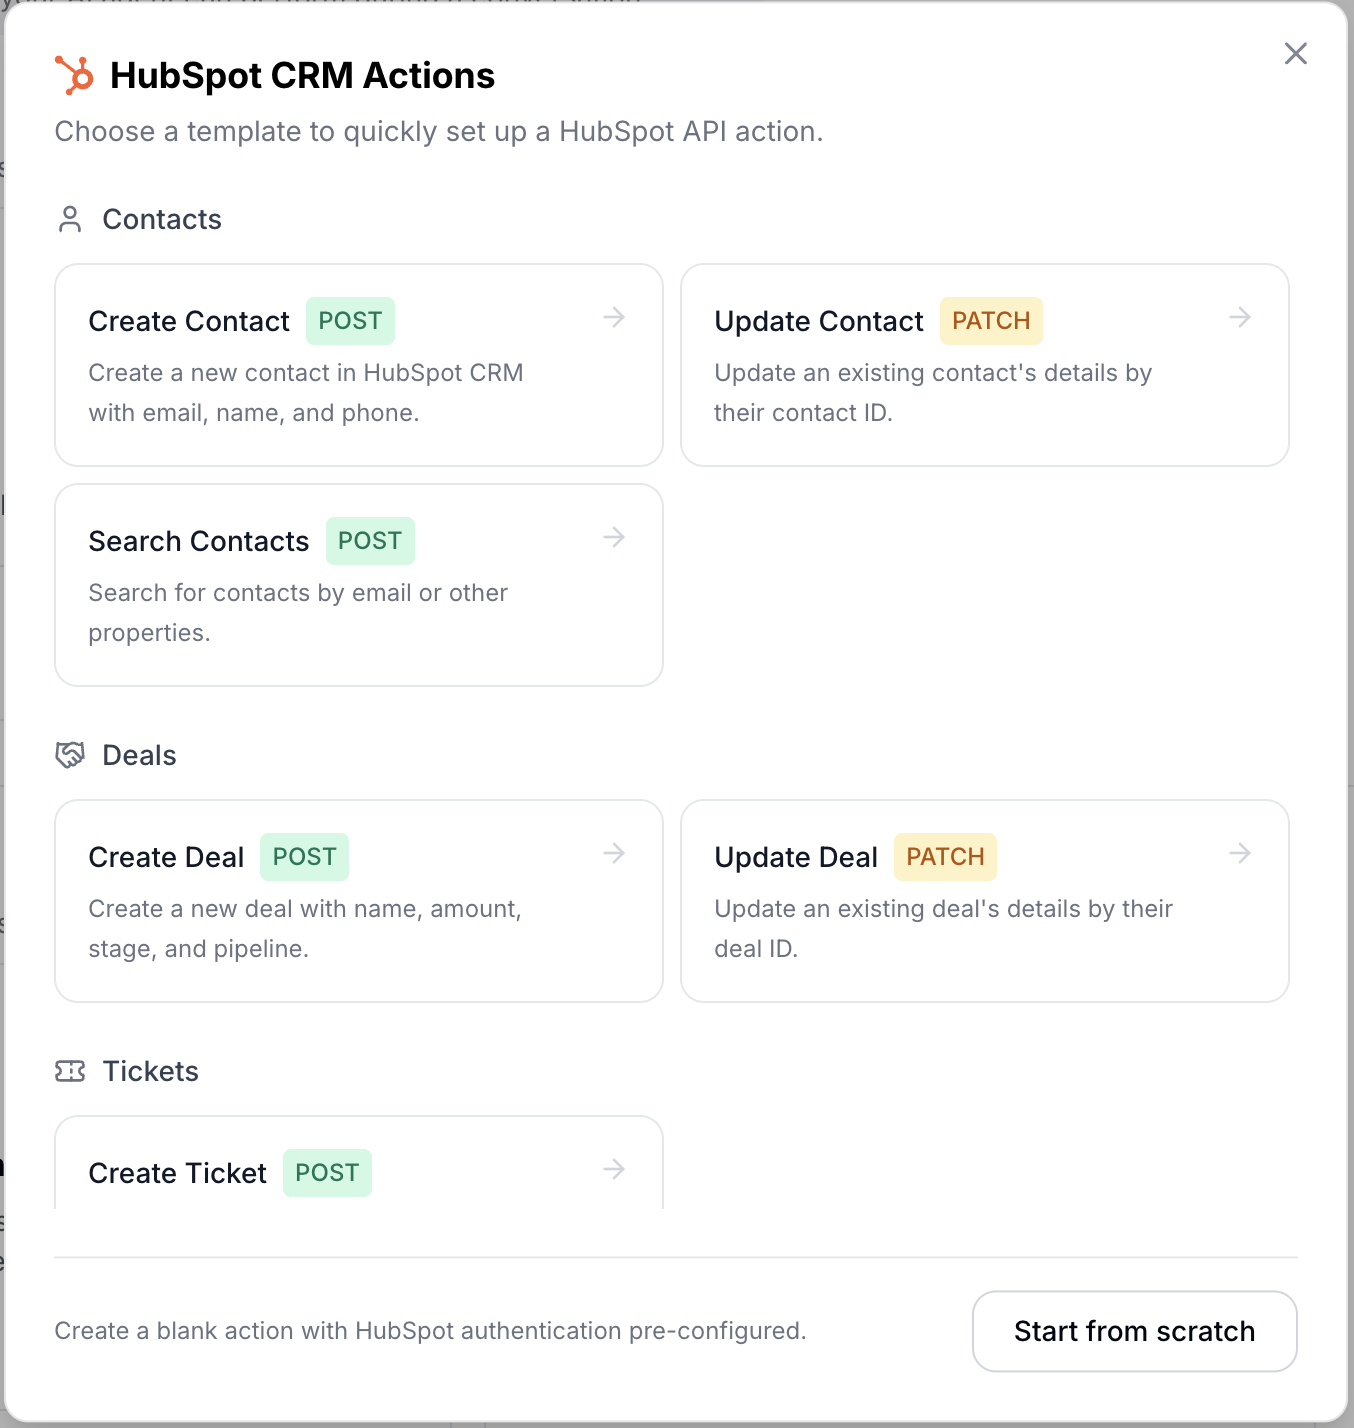
This opens the HubSpot Template Gallery, which contains pre-built action templates organized by category: Contacts, Deals, and Tickets.
Step 3: Choose a Template
Select the action you want your AI Agent to perform. Let’s walk through each category.
Contacts
- Create Contact (POST): Creates a new contact in your HubSpot CRM. The AI collects the contact’s email, first name, last name, and optionally a phone number during the conversation.
- Update Contact (PATCH): Updates an existing contact’s properties. Requires a contact ID and accepts any combination of email, name, and phone updates.
- Search Contacts (POST): Searches your CRM for contacts by email or any other property. Useful for looking up existing customers during a conversation.
Deals
- Create Deal (POST): Opens a new deal in your sales pipeline. The AI collects the deal name, amount, stage, and pipeline from the conversation.
- Update Deal (PATCH): Modifies an existing deal’s properties like name, amount, or stage.
Tickets
- Create Ticket (POST): Files a new support ticket with a subject and description. Useful when a customer reports an issue during chat. The template includes optional
hs_pipelineandhs_pipeline_stageparameters. If your HubSpot account has multiple support pipelines, set these to route tickets to the correct one. If omitted, tickets go to the default pipeline.
For this tutorial, we’ll set up Create Contact as the first action. Click the Create Contact card to proceed.
Step 4: Configure the Action
After selecting a template, the action configuration sheet opens with everything pre-filled:
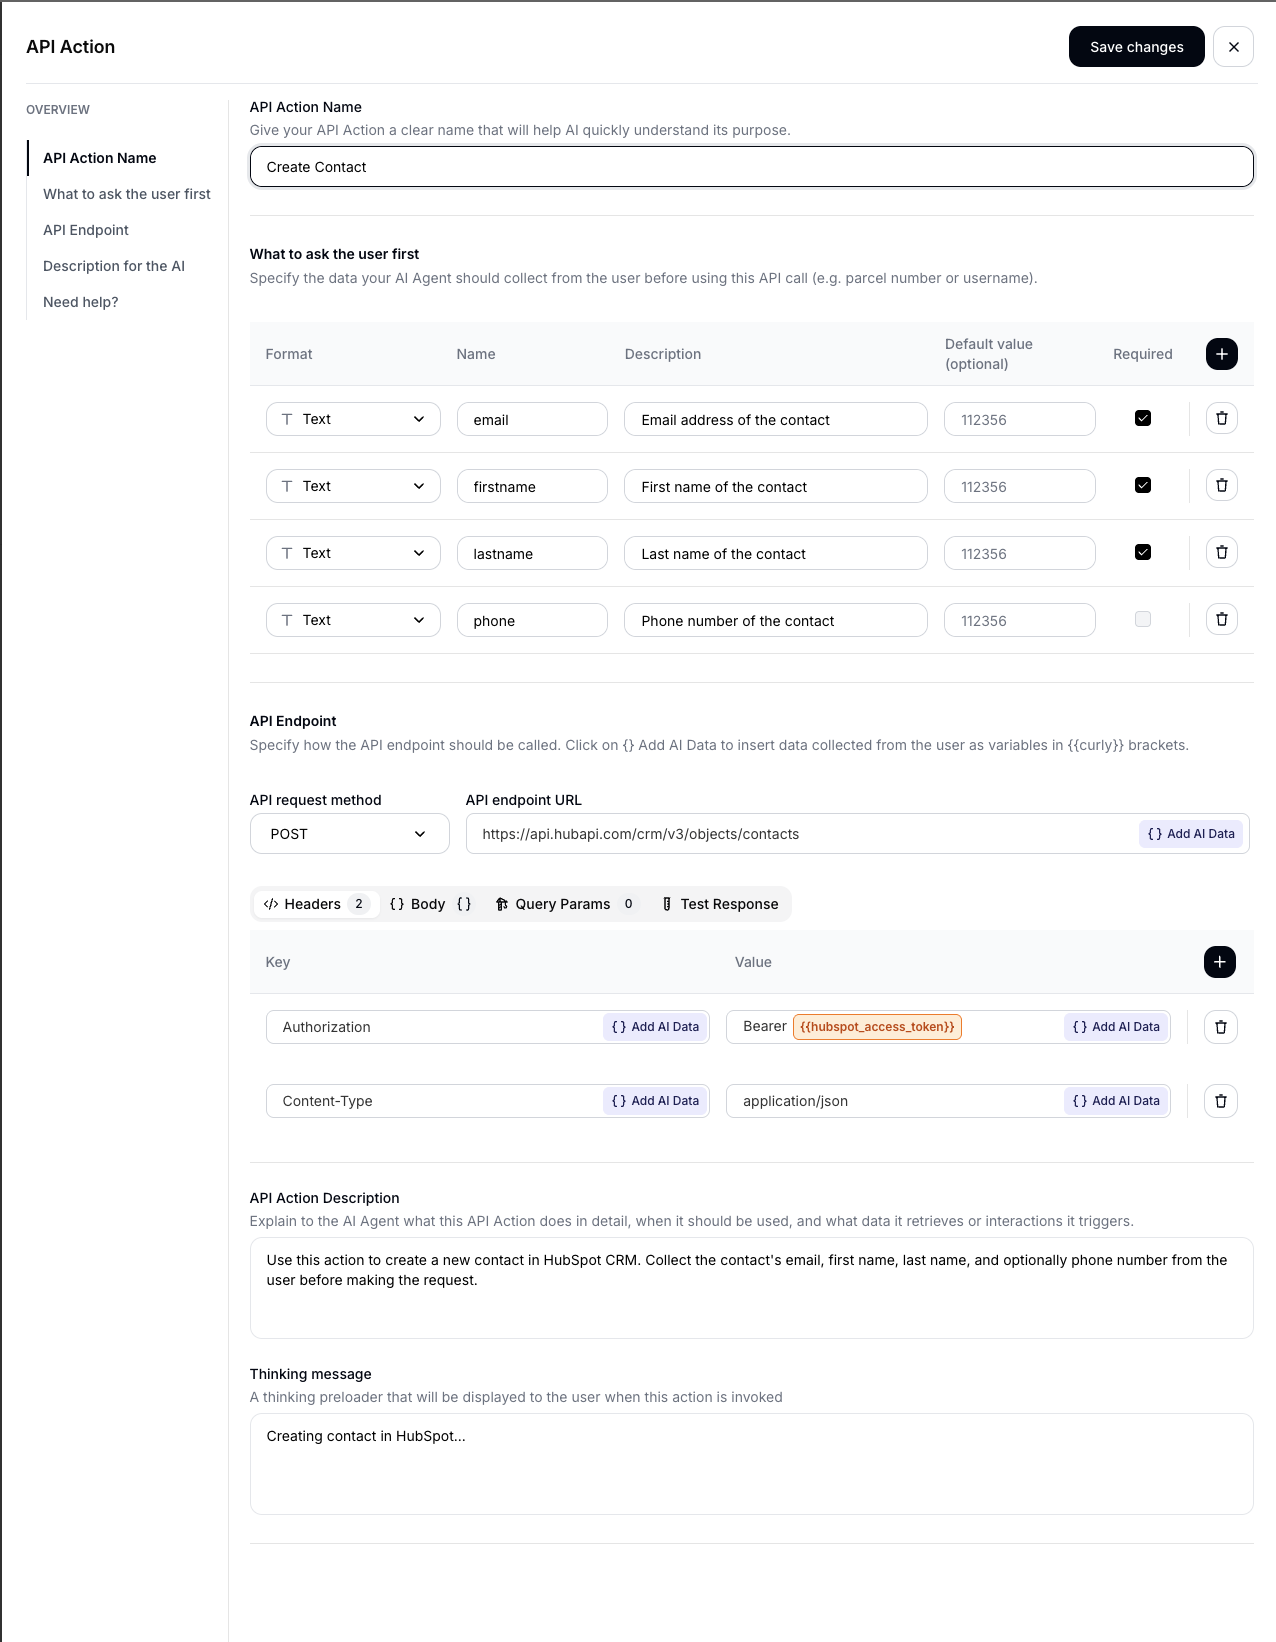
Here’s what each field does:
- Name: A human-readable label for the action (e.g., “HubSpot - Create Contact”).
- AI Description: Tells the AI when and how to use this action. The pre-filled description reads: “Use this action to create a new contact in HubSpot CRM. Collect the contact’s email, first name, last name, and optionally phone number from the user before making the request.”
- Thinking Message: The message shown to the user while the action executes (e.g., “Creating contact in HubSpot…”).
- URL: The HubSpot API endpoint. For Create Contact:
https://api.hubapi.com/crm/v3/objects/contacts - Method: The HTTP method (POST for creation, PATCH for updates).
- Headers: Pre-configured with
Authorization: Bearer {{hubspot_access_token}}andContent-Type: application/json. The token placeholder is resolved server-side at execution time (see the Security section below). You never need to paste API keys. - Body: The JSON request body with parameter placeholders like
{{email}},{{firstname}}, etc. - Parameters: Defines what information the AI should collect from the user. Each parameter has a name, description, type, and required/optional flag.
For reference, here is the full body template for Create Contact:
{
  "properties": {
    "email": "{{email}}",
    "firstname": "{{firstname}}",
    "lastname": "{{lastname}}",
    "phone": "{{phone}}"
  }
}
Each {{param_name}} placeholder maps to a parameter defined in the Parameters section. At execution time, the AI fills these with values collected from the conversation.
You can customize any of these fields. For example, you might want to:
- Edit the AI Description to give more specific instructions (e.g., “Only create a contact after the user has confirmed their details”)
- Add parameters for custom HubSpot properties. For example, if your CRM has a
company_nameproperty on contacts, add a new parameter namedcompany_name, then add"company_name": "{{company_name}}"to thepropertiesobject in the Body JSON. - Change default values or mark optional parameters as required
Step 5: Review Parameters
Parameters define what information the AI needs to collect from the conversation before executing the action.
For Create Contact, the default parameters are:
| Parameter | Type | Required | Description |
|---|---|---|---|
email | String | Yes | Email address of the contact |
firstname | String | Yes | First name of the contact |
lastname | String | Yes | Last name of the contact |
phone | String | No | Phone number of the contact |
The AI collects these values during the conversation rather than presenting them as a form. It determines the order and phrasing based on conversation context.
Step 6: Save and Test
-
Click Save to activate the action.
-
Open the Sandbox (test chat) in your Quickchat AI dashboard.
-
Start a conversation that should trigger the action. For Create Contact, a message like this works:
“Hi, I’d like to get in touch. My name is John Doe, email john@example.com”
The AI will recognize the contact details and either ask for any missing required fields (like last name, if not parsed) or proceed to create the contact.
-
Verify that the record appears in your HubSpot CRM.
Check the action execution logs in the Quickchat AI dashboard to confirm the request was successful (look for the 200 OK response).
What happens when an API call fails
If the HubSpot API returns an error, the AI adjusts its response accordingly and lets the user know the operation did not go through. Common failure cases:
- Duplicate contact email: HubSpot rejects the request with a
409 Conflict. The AI can suggest updating the existing contact instead. - Missing required fields: If a required HubSpot property is missing, the API returns a
400error. Check that all required parameters are marked as required in the action configuration. - Insufficient permissions: Returns
401. This means the OAuth scopes granted during authorization don’t cover the endpoint the action is calling. Re-authorize the HubSpot connection from the Integrations page with the required scopes.
Setting Up More Actions
Once you’ve set up your first action, adding more follows the same pattern:
- Go to Actions > + Add Action > HubSpot
- Select a different template from the gallery
- Customize if needed
- Save and test
Example: Create Deal + Create Contact Together
A powerful pattern is combining multiple actions. For instance, you could set up both Create Contact and Create Deal so that when a prospect expresses interest:
- The AI creates a contact with their info
- Then immediately creates a deal associated with that conversation
The AI description is what guides this behavior. You can write something like:
“When a user shows purchasing intent, first create a contact with their details, then create a deal with the product they’re interested in.”
Example: Create Ticket for Support
If your AI Agent handles customer support, Create Ticket is the most relevant action. When a customer reports an issue that requires human follow-up:
- The AI collects the issue summary and details
- Creates a ticket in your HubSpot service pipeline
- Confirms to the customer that their issue has been logged
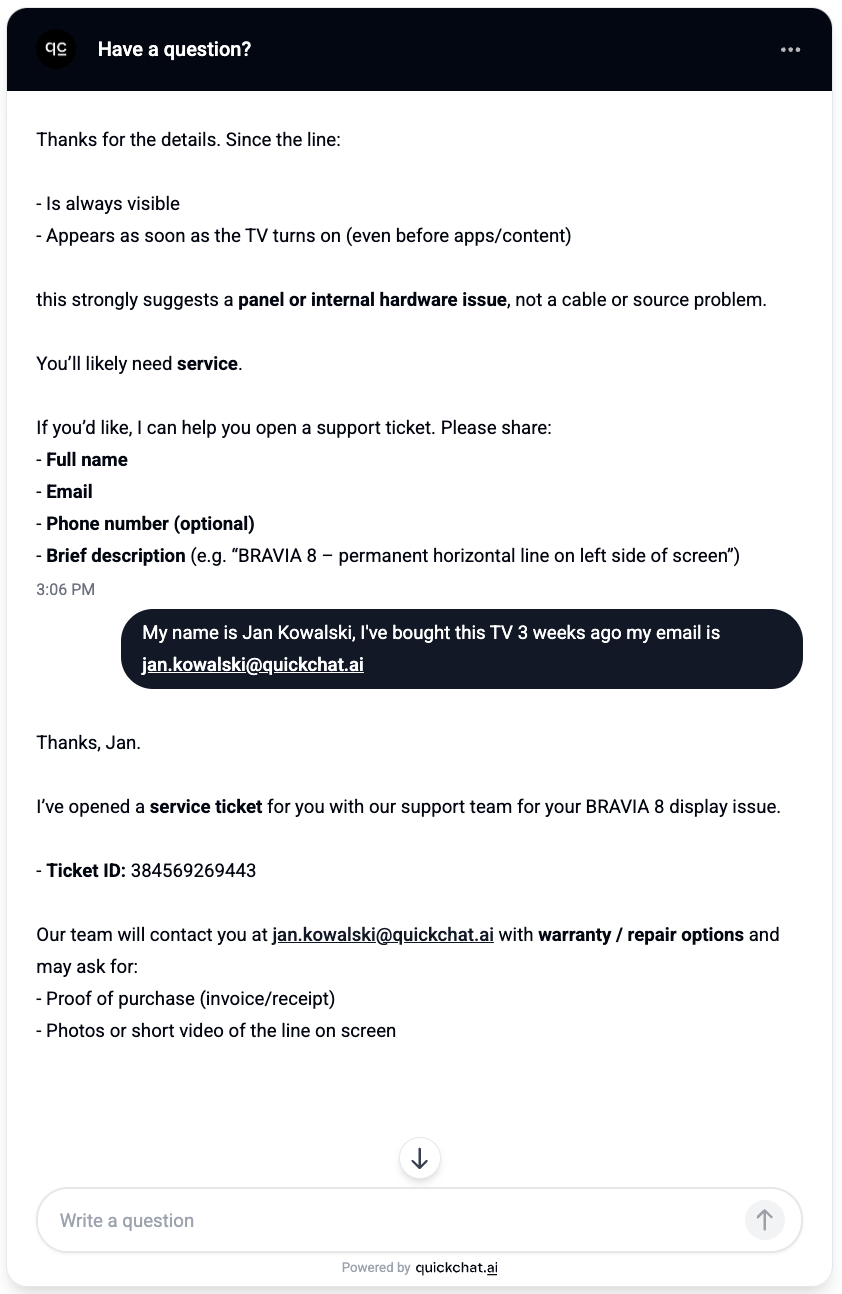
In the screenshot below, a customer reports a hardware issue with their TV. The AI Agent diagnoses the problem, collects the customer’s details, and creates a support ticket:
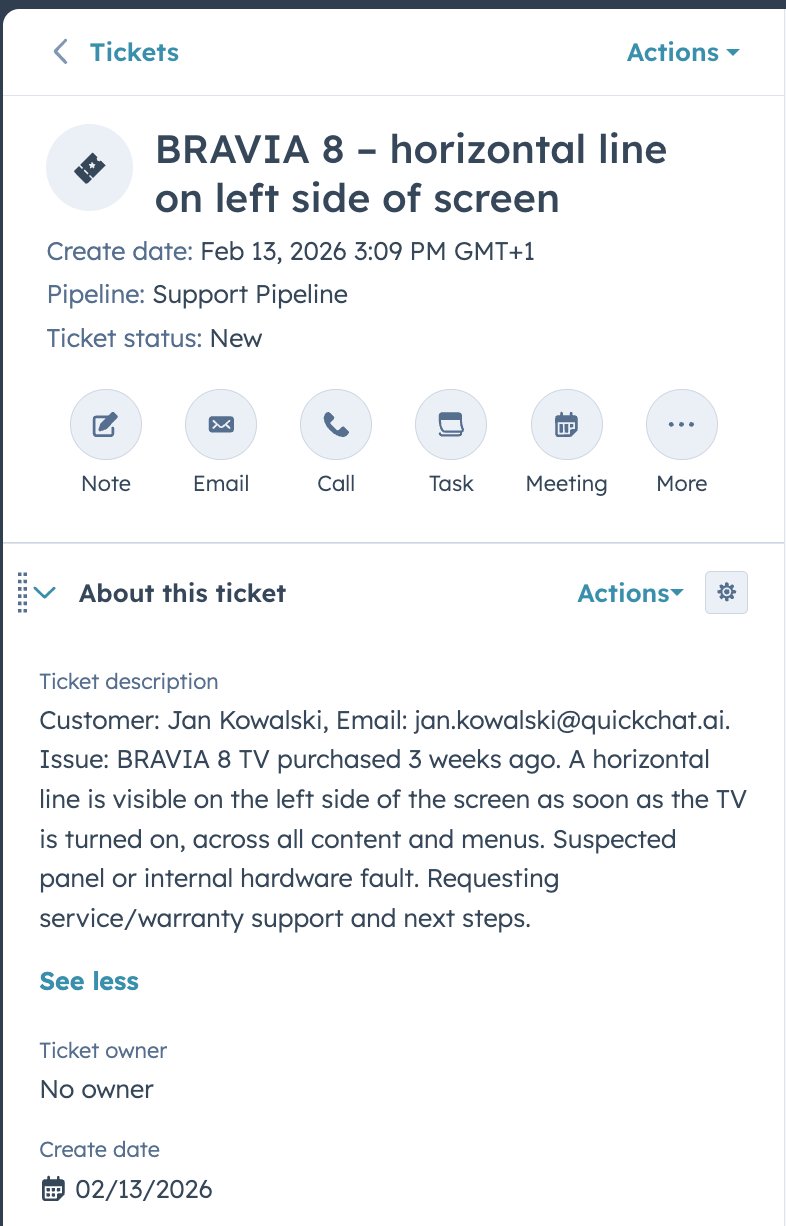
And the resulting ticket in HubSpot, created automatically with the customer’s details and issue description:
This works around the clock, so tickets are created even when no human agents are online.
Building Custom Actions
The Start from Scratch option at the bottom of the template gallery creates a blank action pre-configured with HubSpot authentication headers. You can point it at any HubSpot API endpoint.
Some ideas for custom actions:
- Search Deals by name or amount
- Add a Note to a contact or deal
- Create a Company record
- Update Ticket Status when a resolution is provided in chat
Security and Authentication
HubSpot AI Actions use OAuth 2.0 for authentication:
- No API keys to manage: The connection uses OAuth tokens that are refreshed automatically before each API call. You do not paste tokens or keys anywhere in the action configuration.
- Credentials never reach the AI: The
{{hubspot_access_token}}placeholder in the Headers field is a server-side substitution. When the action executes, the Quickchat backend replaces it with the actual OAuth token. The token string never appears in the action configuration UI, is never sent to the AI model, and is not visible in logs. - Granular permissions: Only the scopes you authorized during the OAuth flow are available (see the scopes table in Step 1 above).
- Revocable access: You can disconnect the Quickchat AI application from HubSpot’s Connected Apps settings at any time. For a less disruptive change, you can disable individual AI Actions from the Quickchat dashboard without revoking the entire OAuth connection.
What’s Next?
Once HubSpot AI Actions are running, the next steps are typically combining them with Human Handoff for escalation workflows and Smart Lead Generation for automatic data collection.
For more advanced use cases, see our guide on building custom API actions with Slack notifications and the full Actions documentation.
For help with custom HubSpot workflows, contact our team.