What is Quickchat AI?
Quickchat AI, a platform designed for building fully customized and multilingual AI Agents powered by state-of-art models, now brings its impressive capabilities to HubSpot Conversations.
With Quickchat AI, you can develop an LLM-based AI Agent tailored to your company branding and designed with the exact knowledge you need to support customers’ inquiries seamlessly.
Integrating Quickchat AI Agent with HubSpot Conversations is a powerful customer service tool that enables businesses to interact with their customers by providing instant support, and build customer relationships, providing automated responses to customer queries and streamlining your customer support processes.
Where do I start?
With the video, if you prefer to watch:
Quickchat prerequisites:
- Create a Quickchat AI account
Step-by-step tutorial:
- Create a new user — this seat be assigned to the AI Agent
- Select the Super Admin permission set
- Ensure the Service Enterprise seat is enabled — hover over your newly created user and click Edit permissions.
- Check if the user status is set to available — hover over your newly created user and click Actions, then Edit user.
- Once your Quickchat AI is ready, navigate to the Quickchat AI dashboard and go to the External apps tab.
- On the list of available platforms, click HubSpot. (Business plan required)
- Provide the exact same email address you used to create the new HubSpot user. It will be responding to messages on behalf of that account.
- Click on Authenticate with HubSpot and follow the on-screen prompts by choosing the appropriate HubSpot workspace. Please keep in mind that you need to have HubSpot Super Admin permissions in order to authenticate your account.
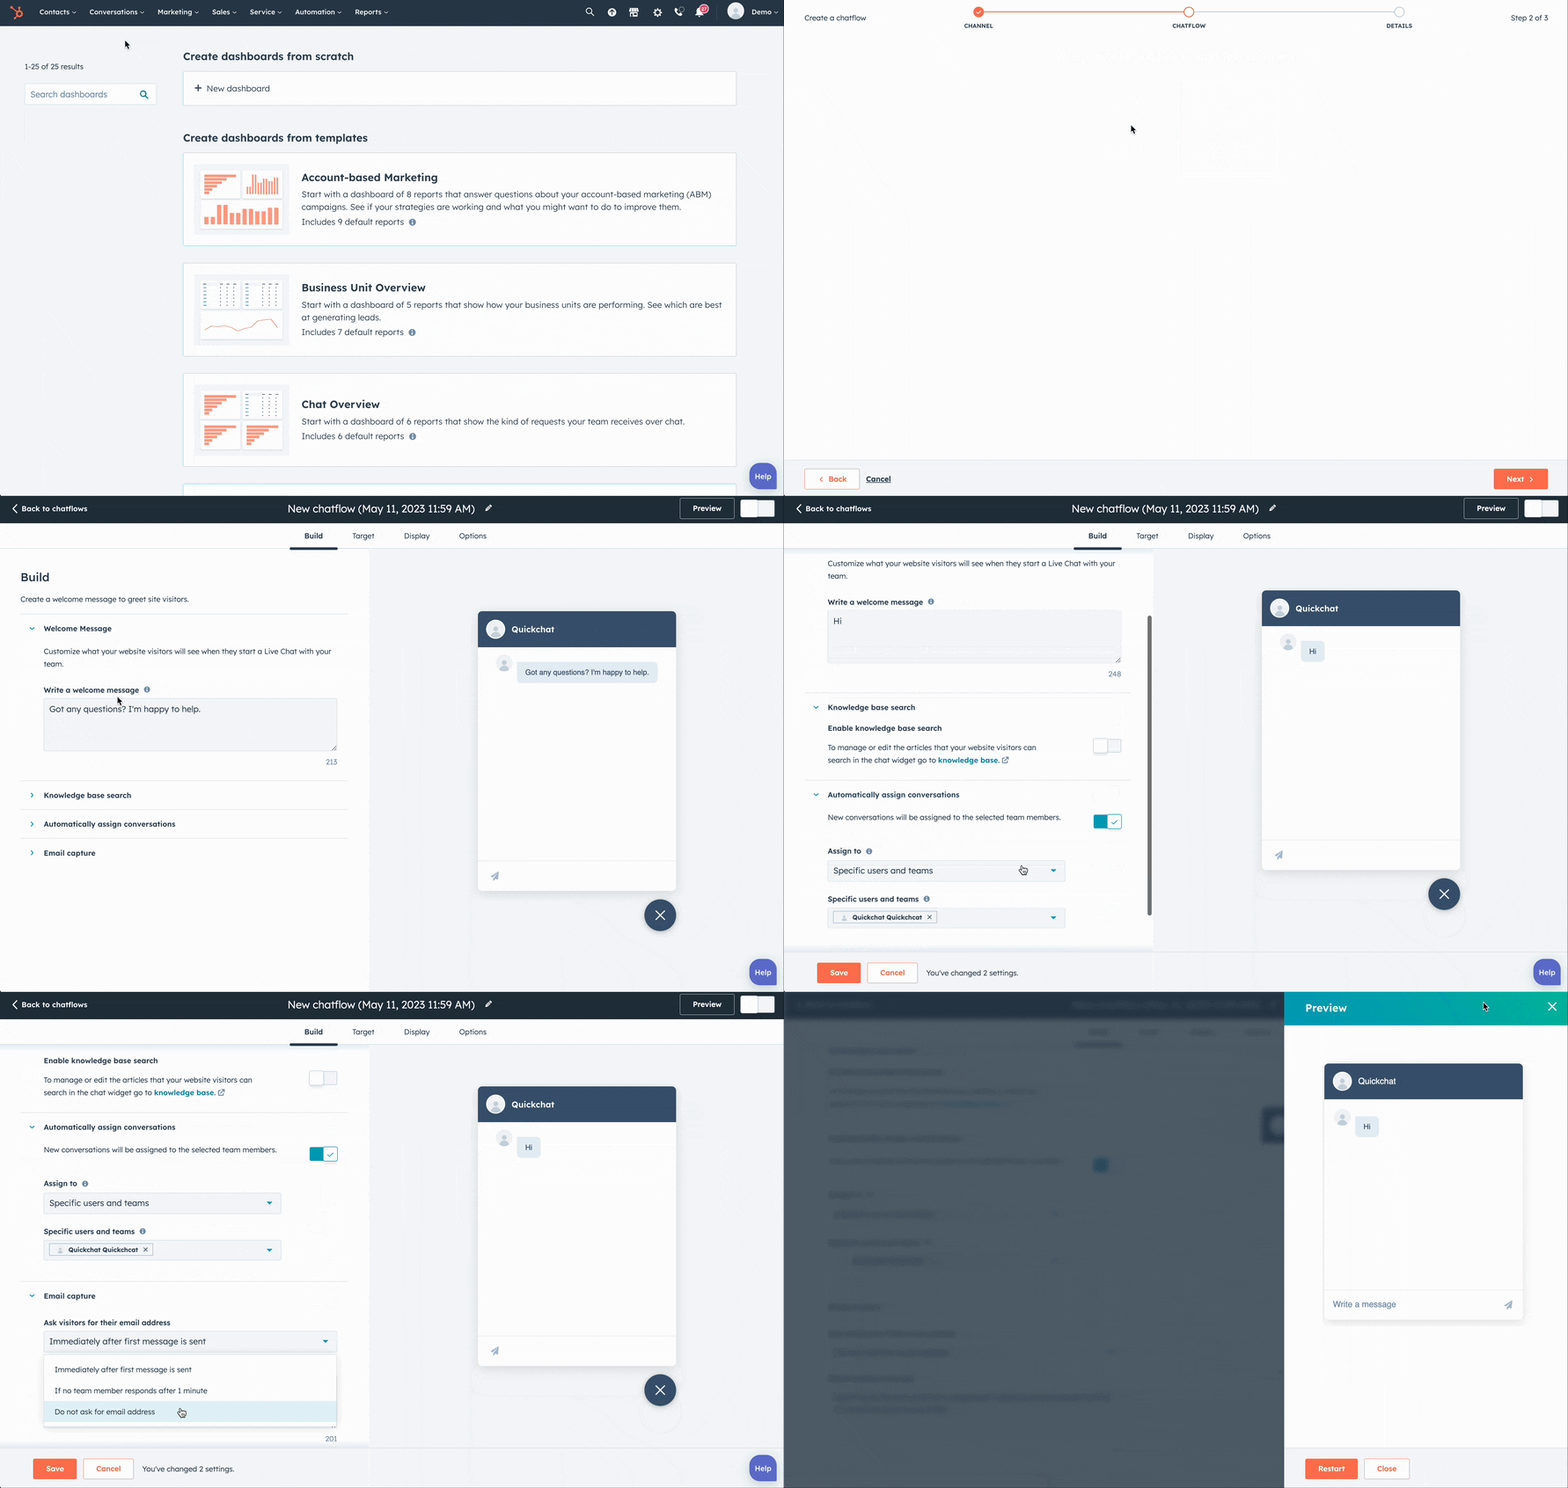
- Go back to HubSpot. Create a new Chatflow on your HubSpot account. Go to the Service tab from the left sidebar and then click Chatflows.
- Create a new Chatflow or edit an existing one.
- Choose Website and then Live chat.
- Select an Inbox and Language. (remember to set the same language in Quickchat AI settings)
- Disable Knowledge base search. AI Agent’s Knowledge Base is handled in the Quickchat AI Platform.
- Select Automatically assign conversations , select Specific users and select your Quickchat AI user (associated with the email address you provided earlier).
- (Optional) Customize your Welcome message.
- (Optional) Disable Email capture.
- Click Preview and send a message. If the AI responds, everything’s set!
- Save your Chatflow.
Important : Ensure your Quickchat AI user is assigned as the “Owner” of a conversation; otherwise, the Quickchat AI Agent won’t respond. Additionally, check other HubSpot features you use, like “Automations,” as they may affect the assignment automatically.
The below video guide summarises these steps.

Your integration is now complete!
If you prefer not to use the HubSpot widget, use Quickchat! Go to Website > Install, and follow the instructions on the screen to add it to your website.
Additional settings
Quickchat AI’s diverse range of additional features is designed to offer a genuinely customized and efficient user experience, perfectly catering to your company’s distinctive needs.
Check out our other features to customize your AI:
- Inbox: Manage all customer conversations in one place.
- Analytics: Track performance metrics and gain insights into your AI Agent’s interactions.
- Smart Data Gathering: Collect leads and conduct user surveys.
- Build a Shopping AI Agent for a Shopify Store: The easiest way to create a product recommendation AI for your Shopify shop.
These powerful customization options, paired with Quickchat AI’s core functions, result in a finely-tuned Conversational AI experience that elevates your customer interactions and sets your brand apart from the competition.
Even more features
If your business requires more custom features, you can contact us at contact@quickchat.ai to provide you with a custom solution tailored to your needs.
That’s it! 🎉
Your HubSpot integration is now ready and your company is enriched with a powerful AI Agent that will help you to improve your customer support and increase your customer satisfaction.

