

What you’ll need
- A Shopify store
- The Shopping Agent by Quickchat AI app installed from the Shopify App Marketplace
- User permission to edit themes
Time to complete: ~2 minutes
Step 1: Open your Theme Editor
You can get to the Theme Editor in two ways:
Option A (recommended): deep link from the app
In the Quickchat AI app → Your website → Install tab → click Embed in your Shopify Store.
This opens your store’s Theme Editor directly on the page where the app embed can be enabled.
Option B: from Shopify admin
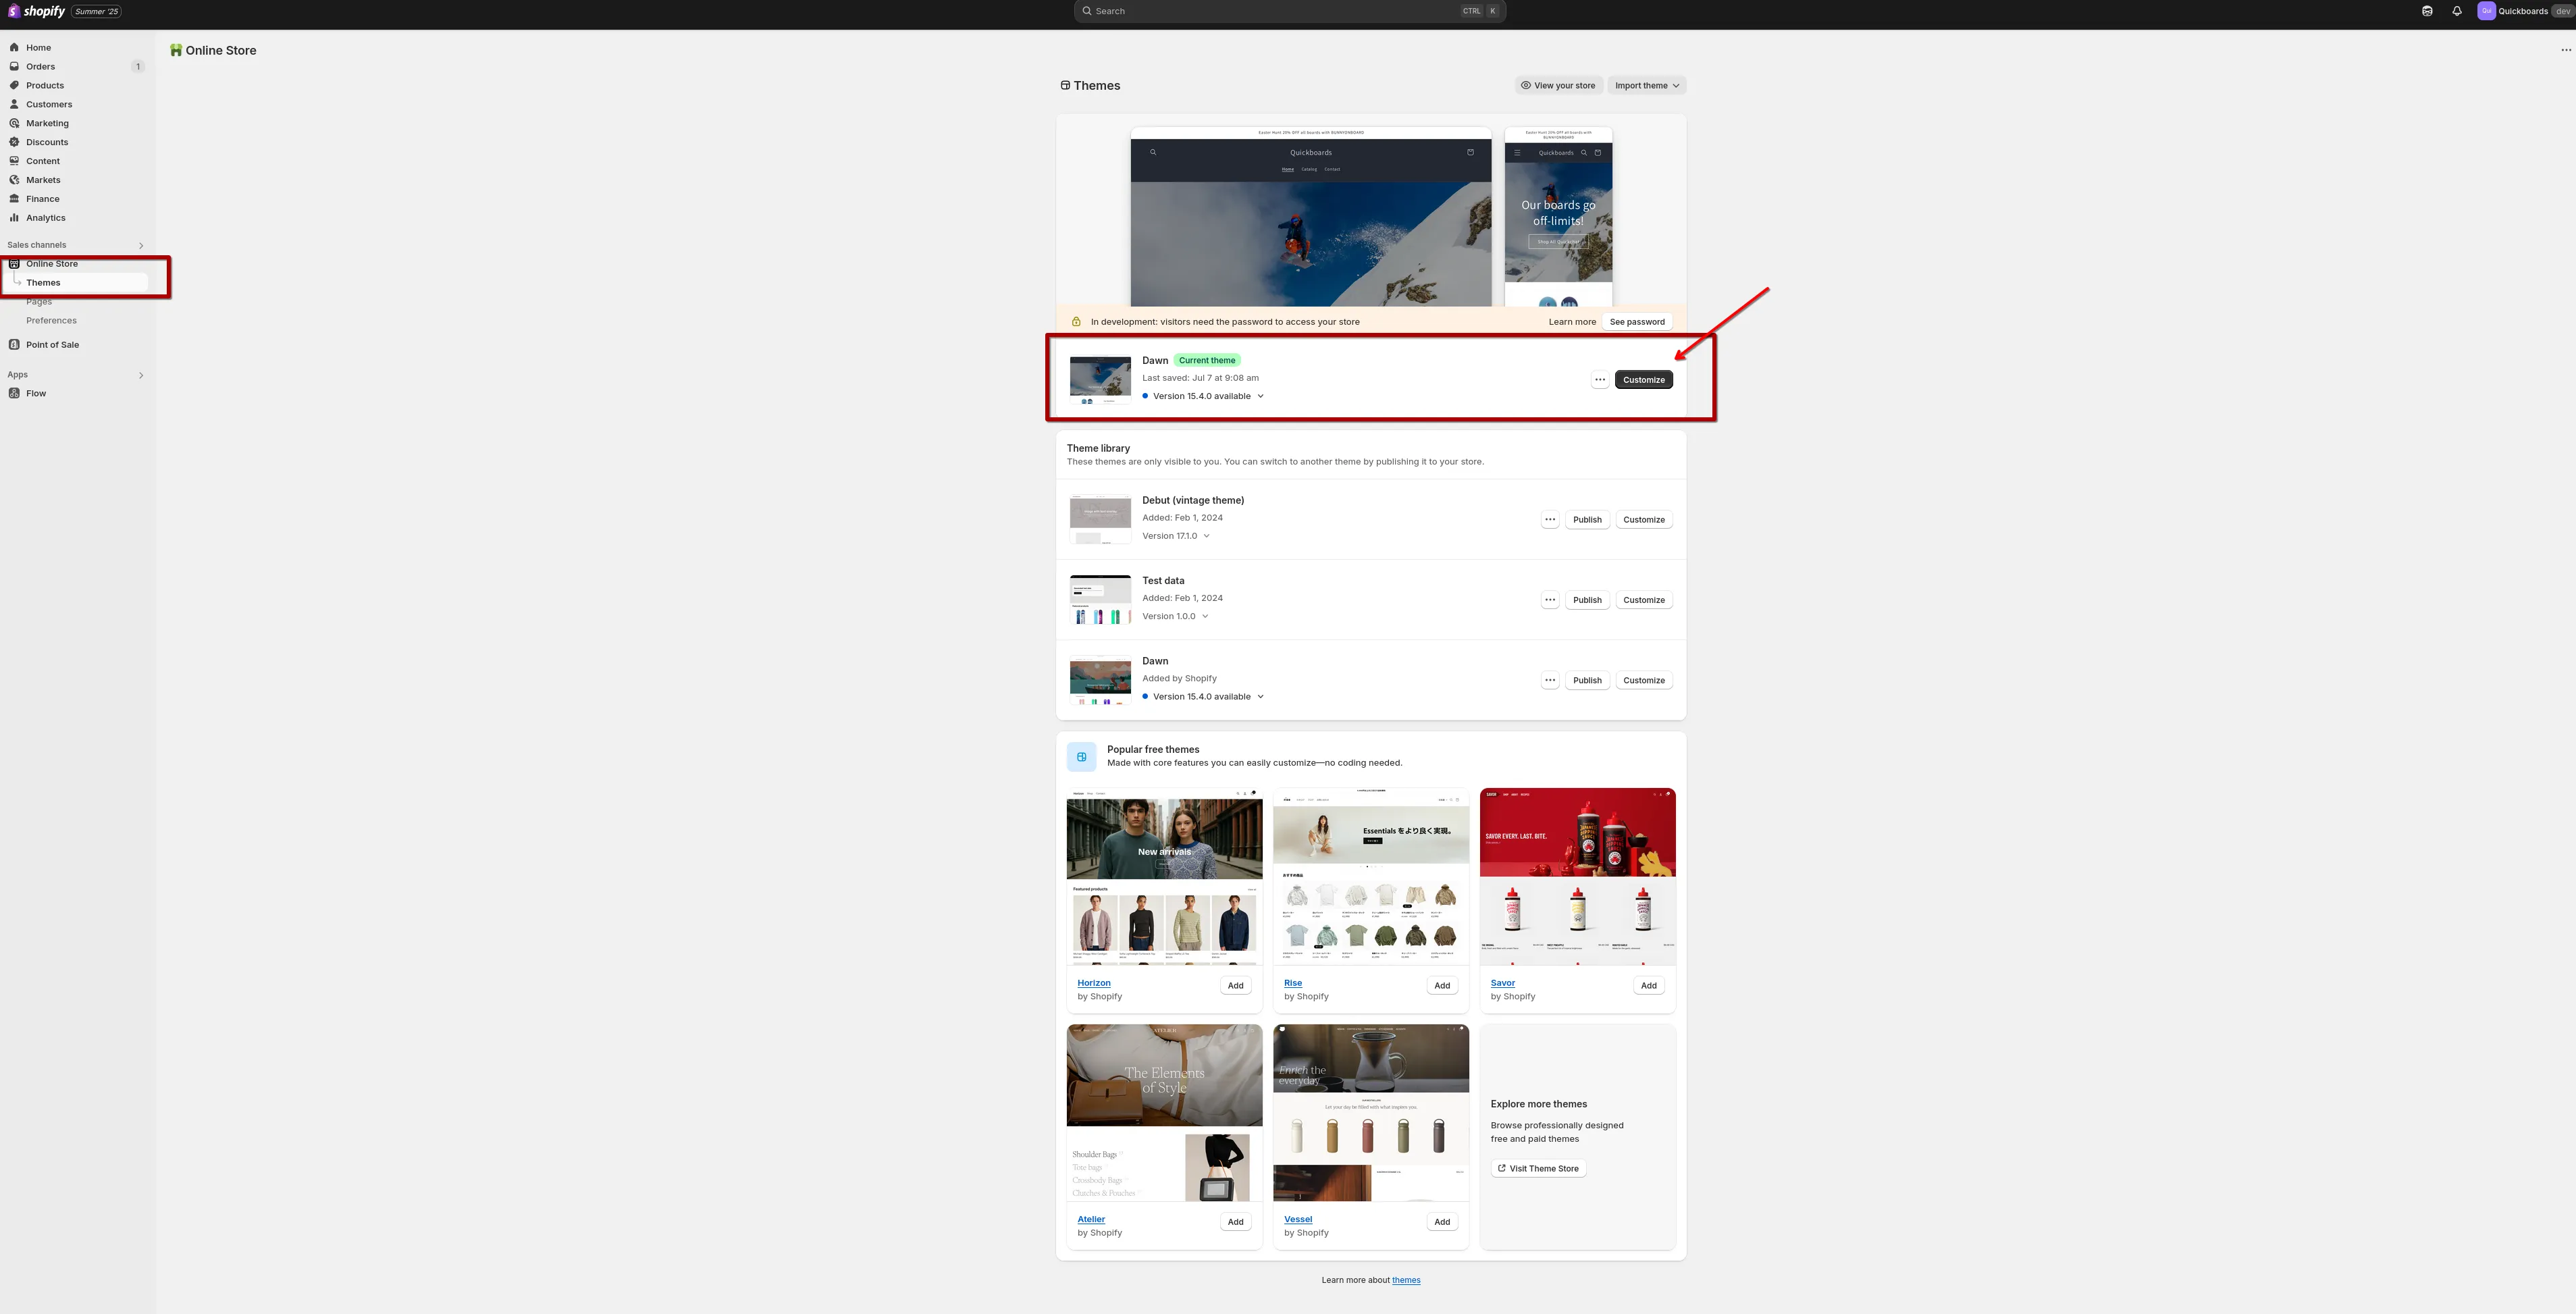
Shopify Admin → Online Store → Themes → on your current theme click Customize.
Step 2: Enable the app embed
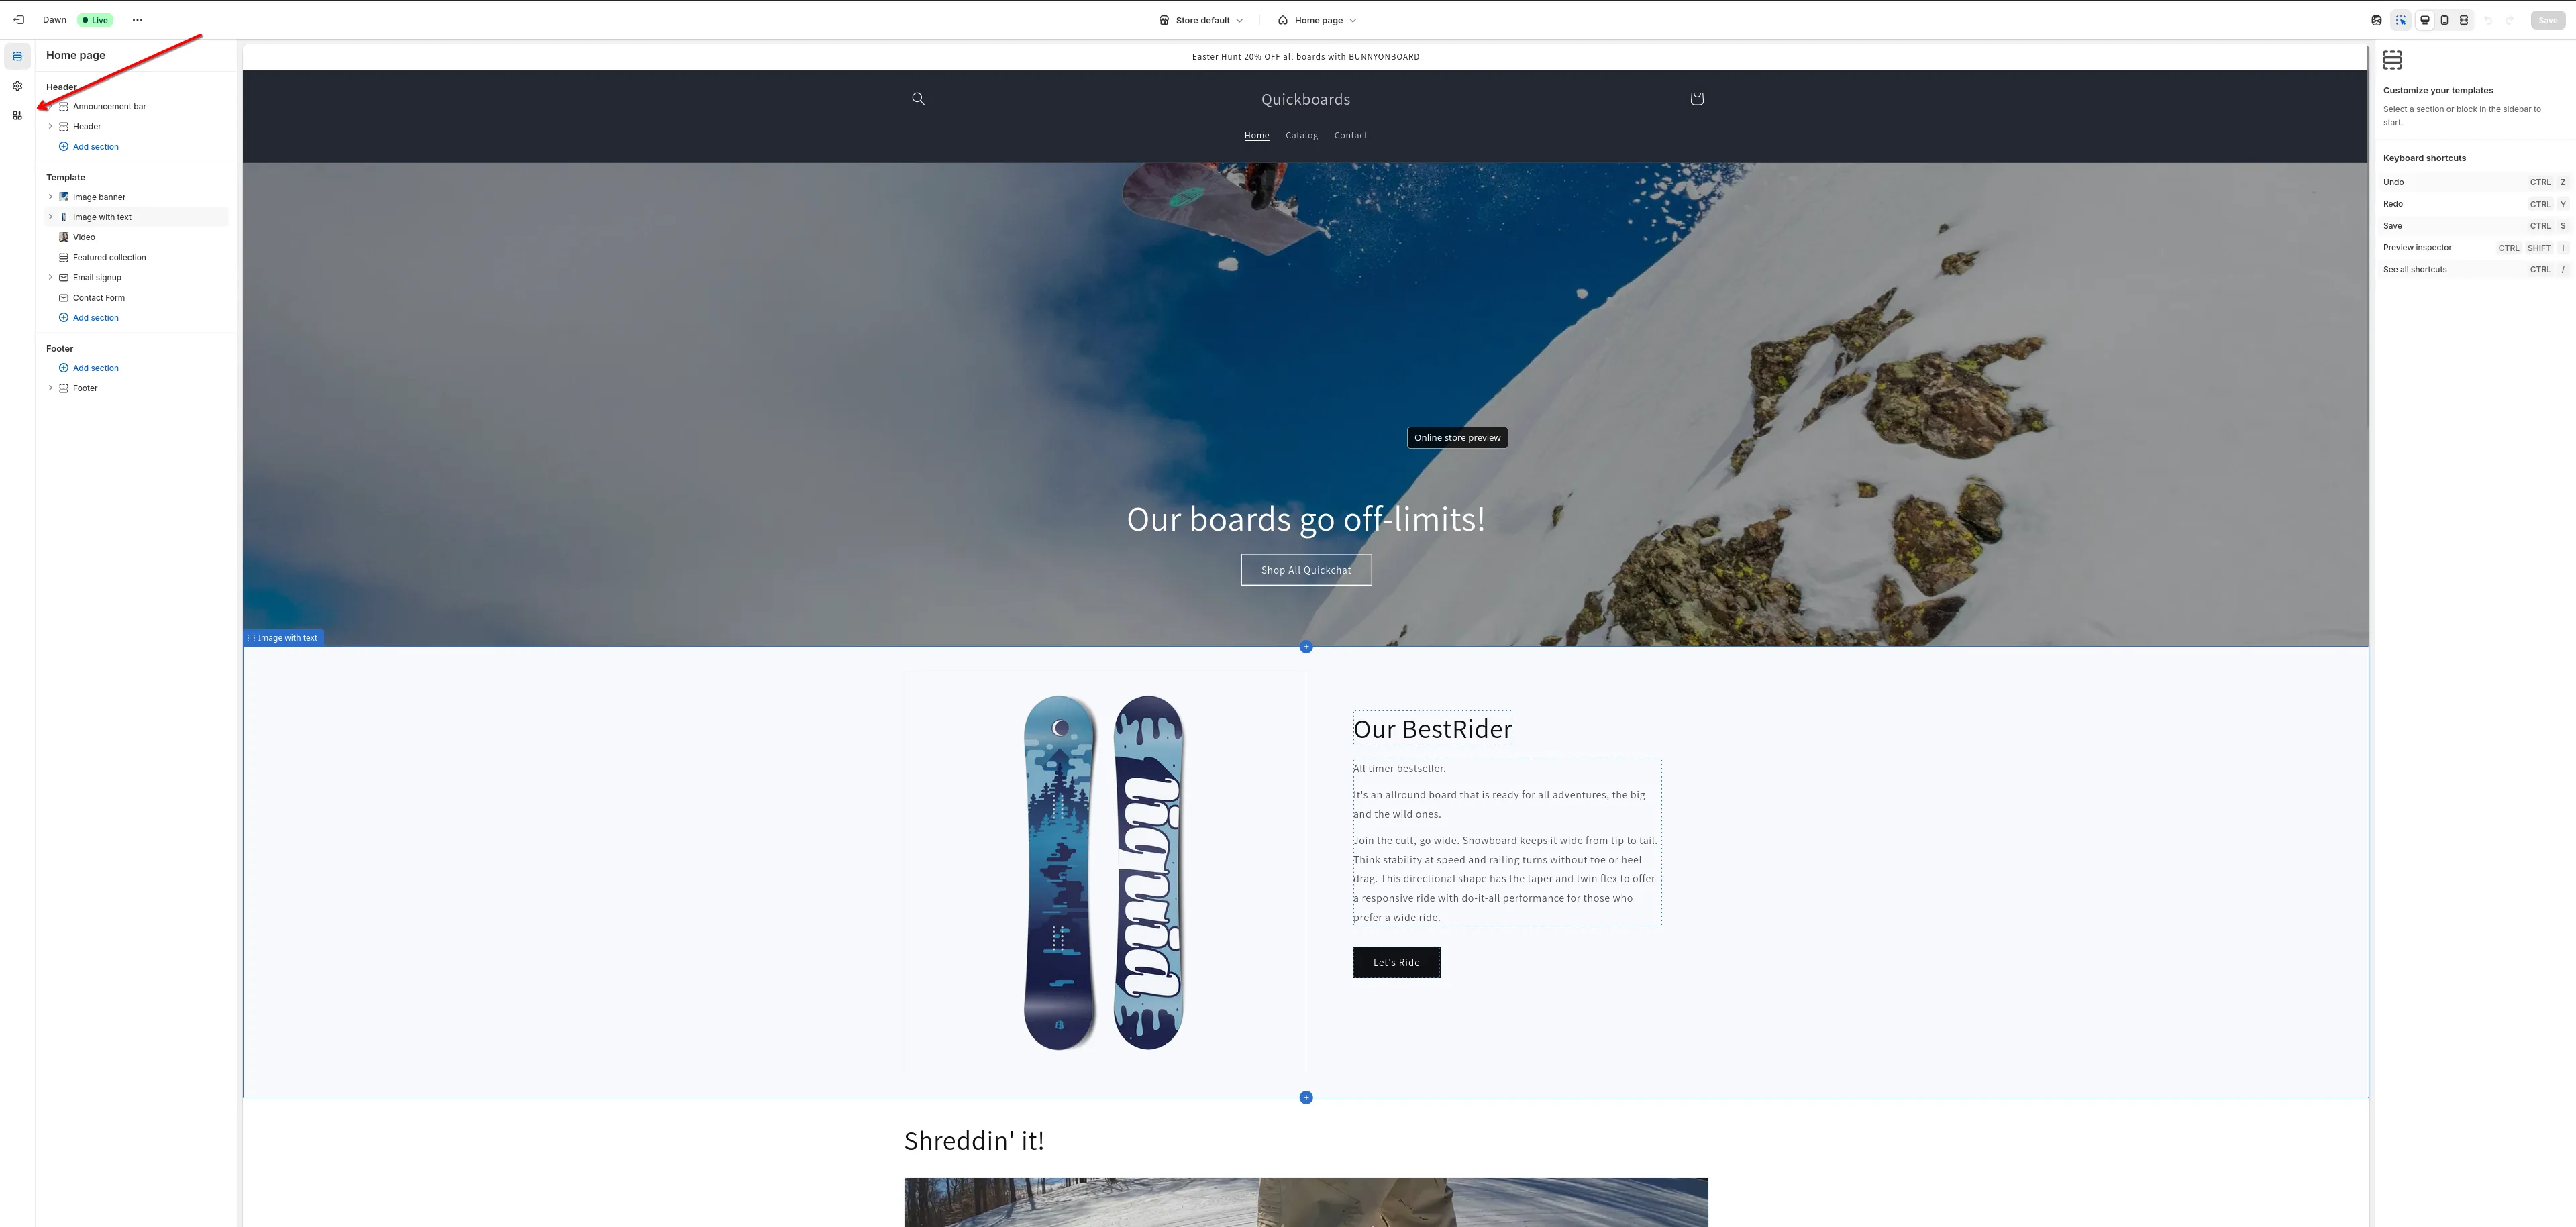
Inside the Theme Editor, open the left sidebar and go to App embeds.
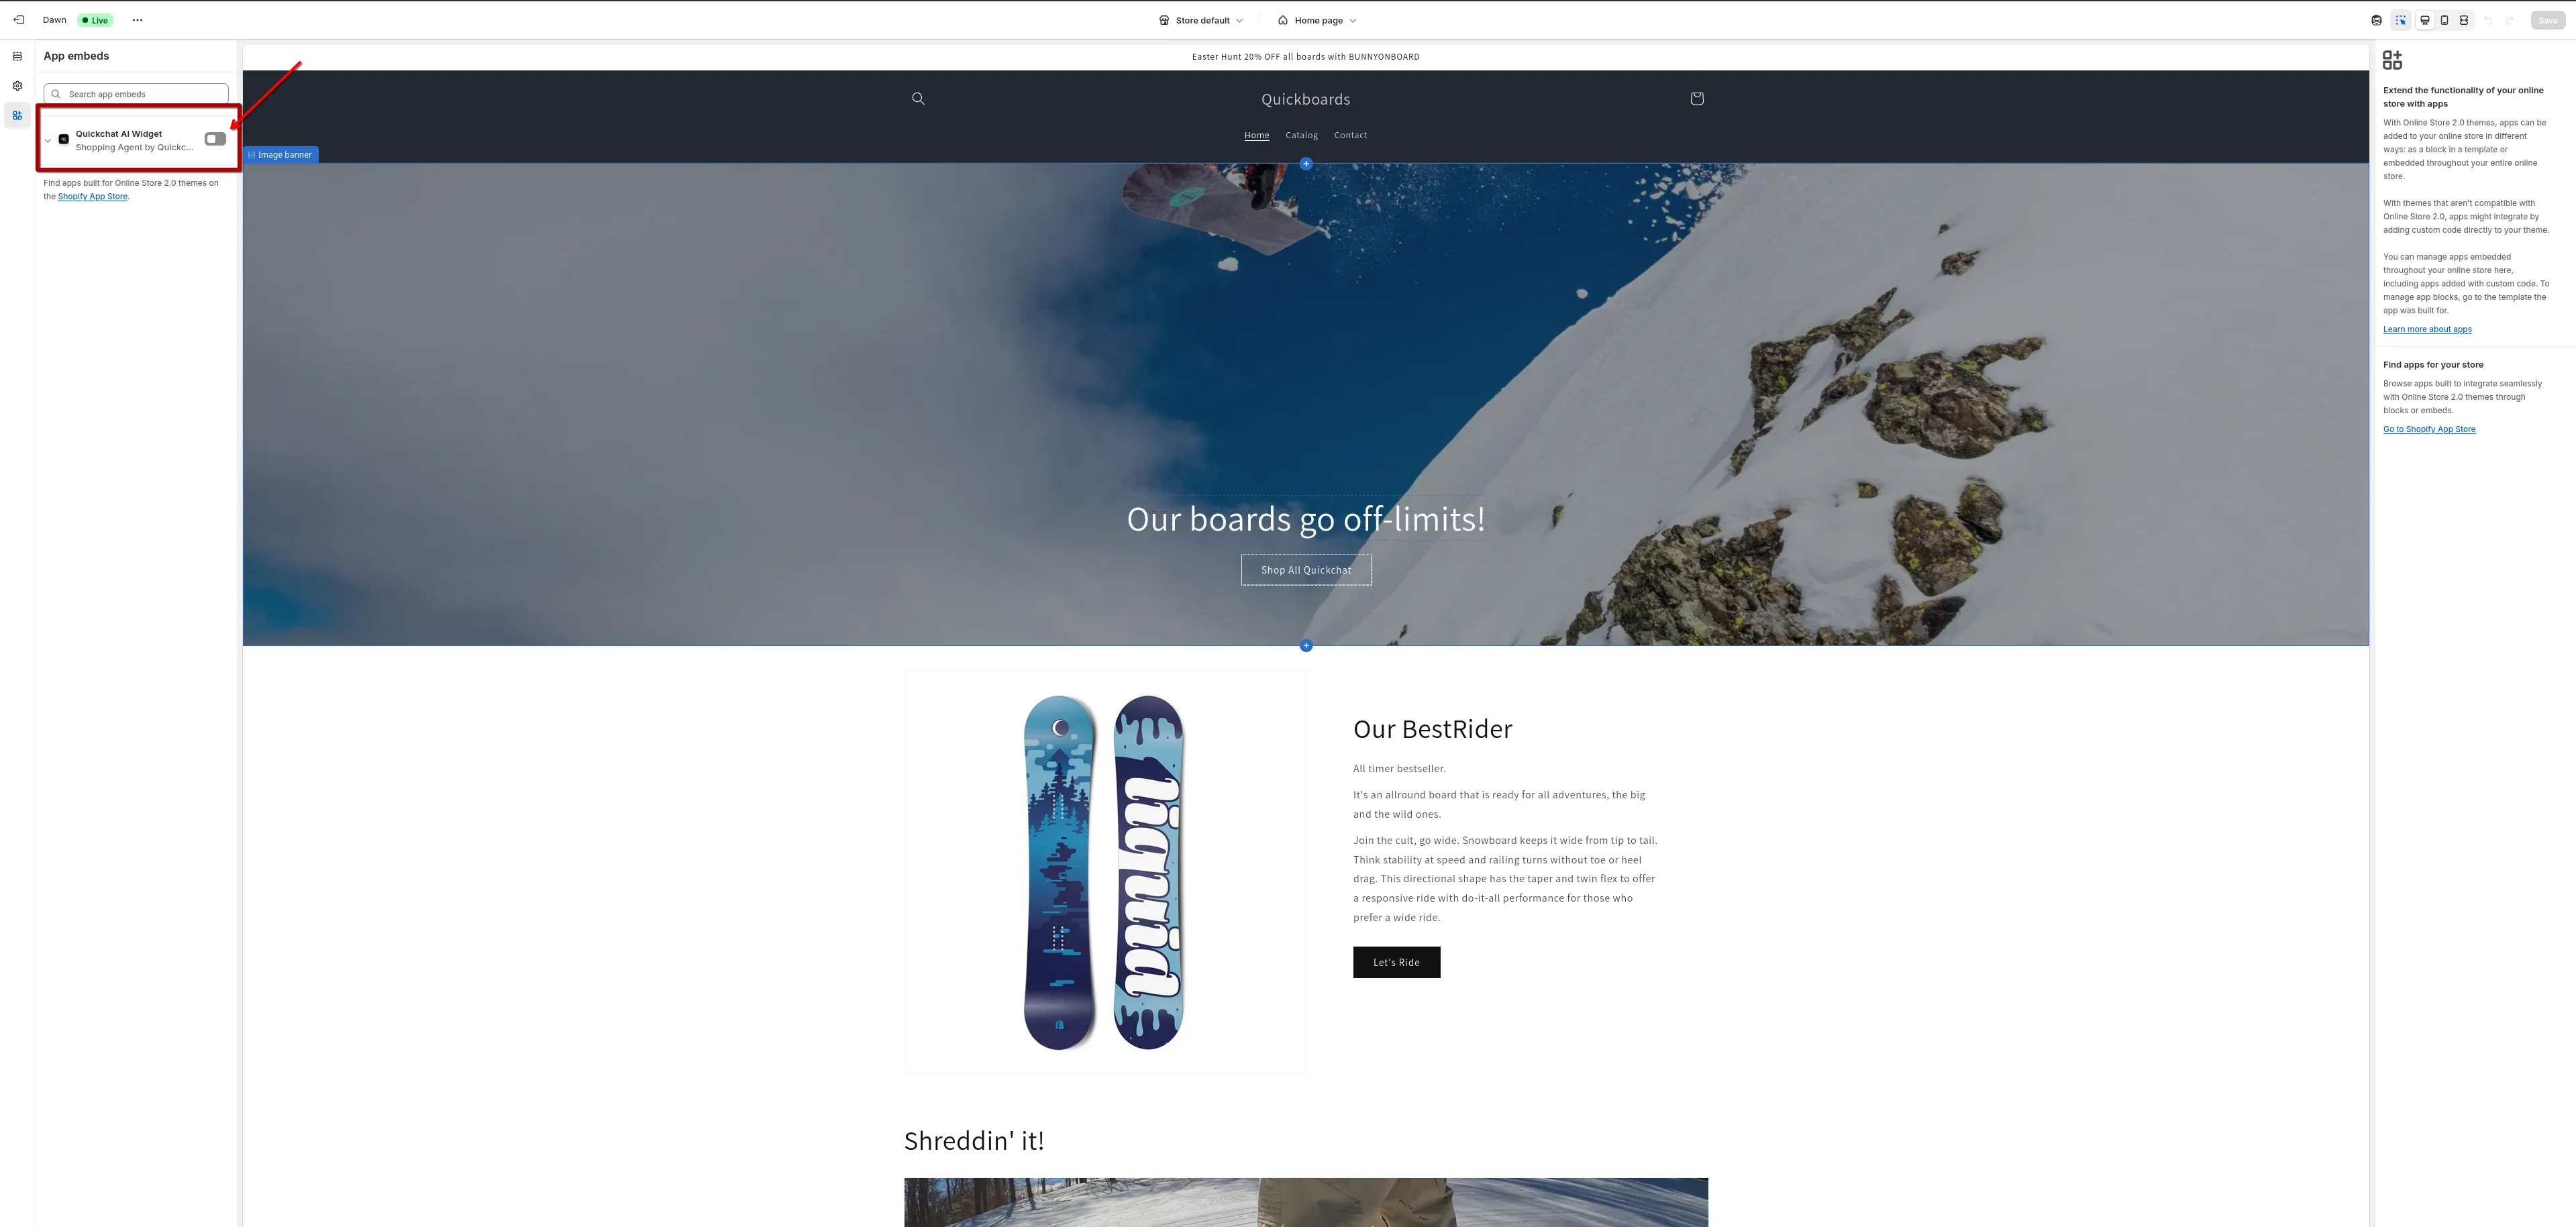
Find Quickchat AI Widget and toggle it on.
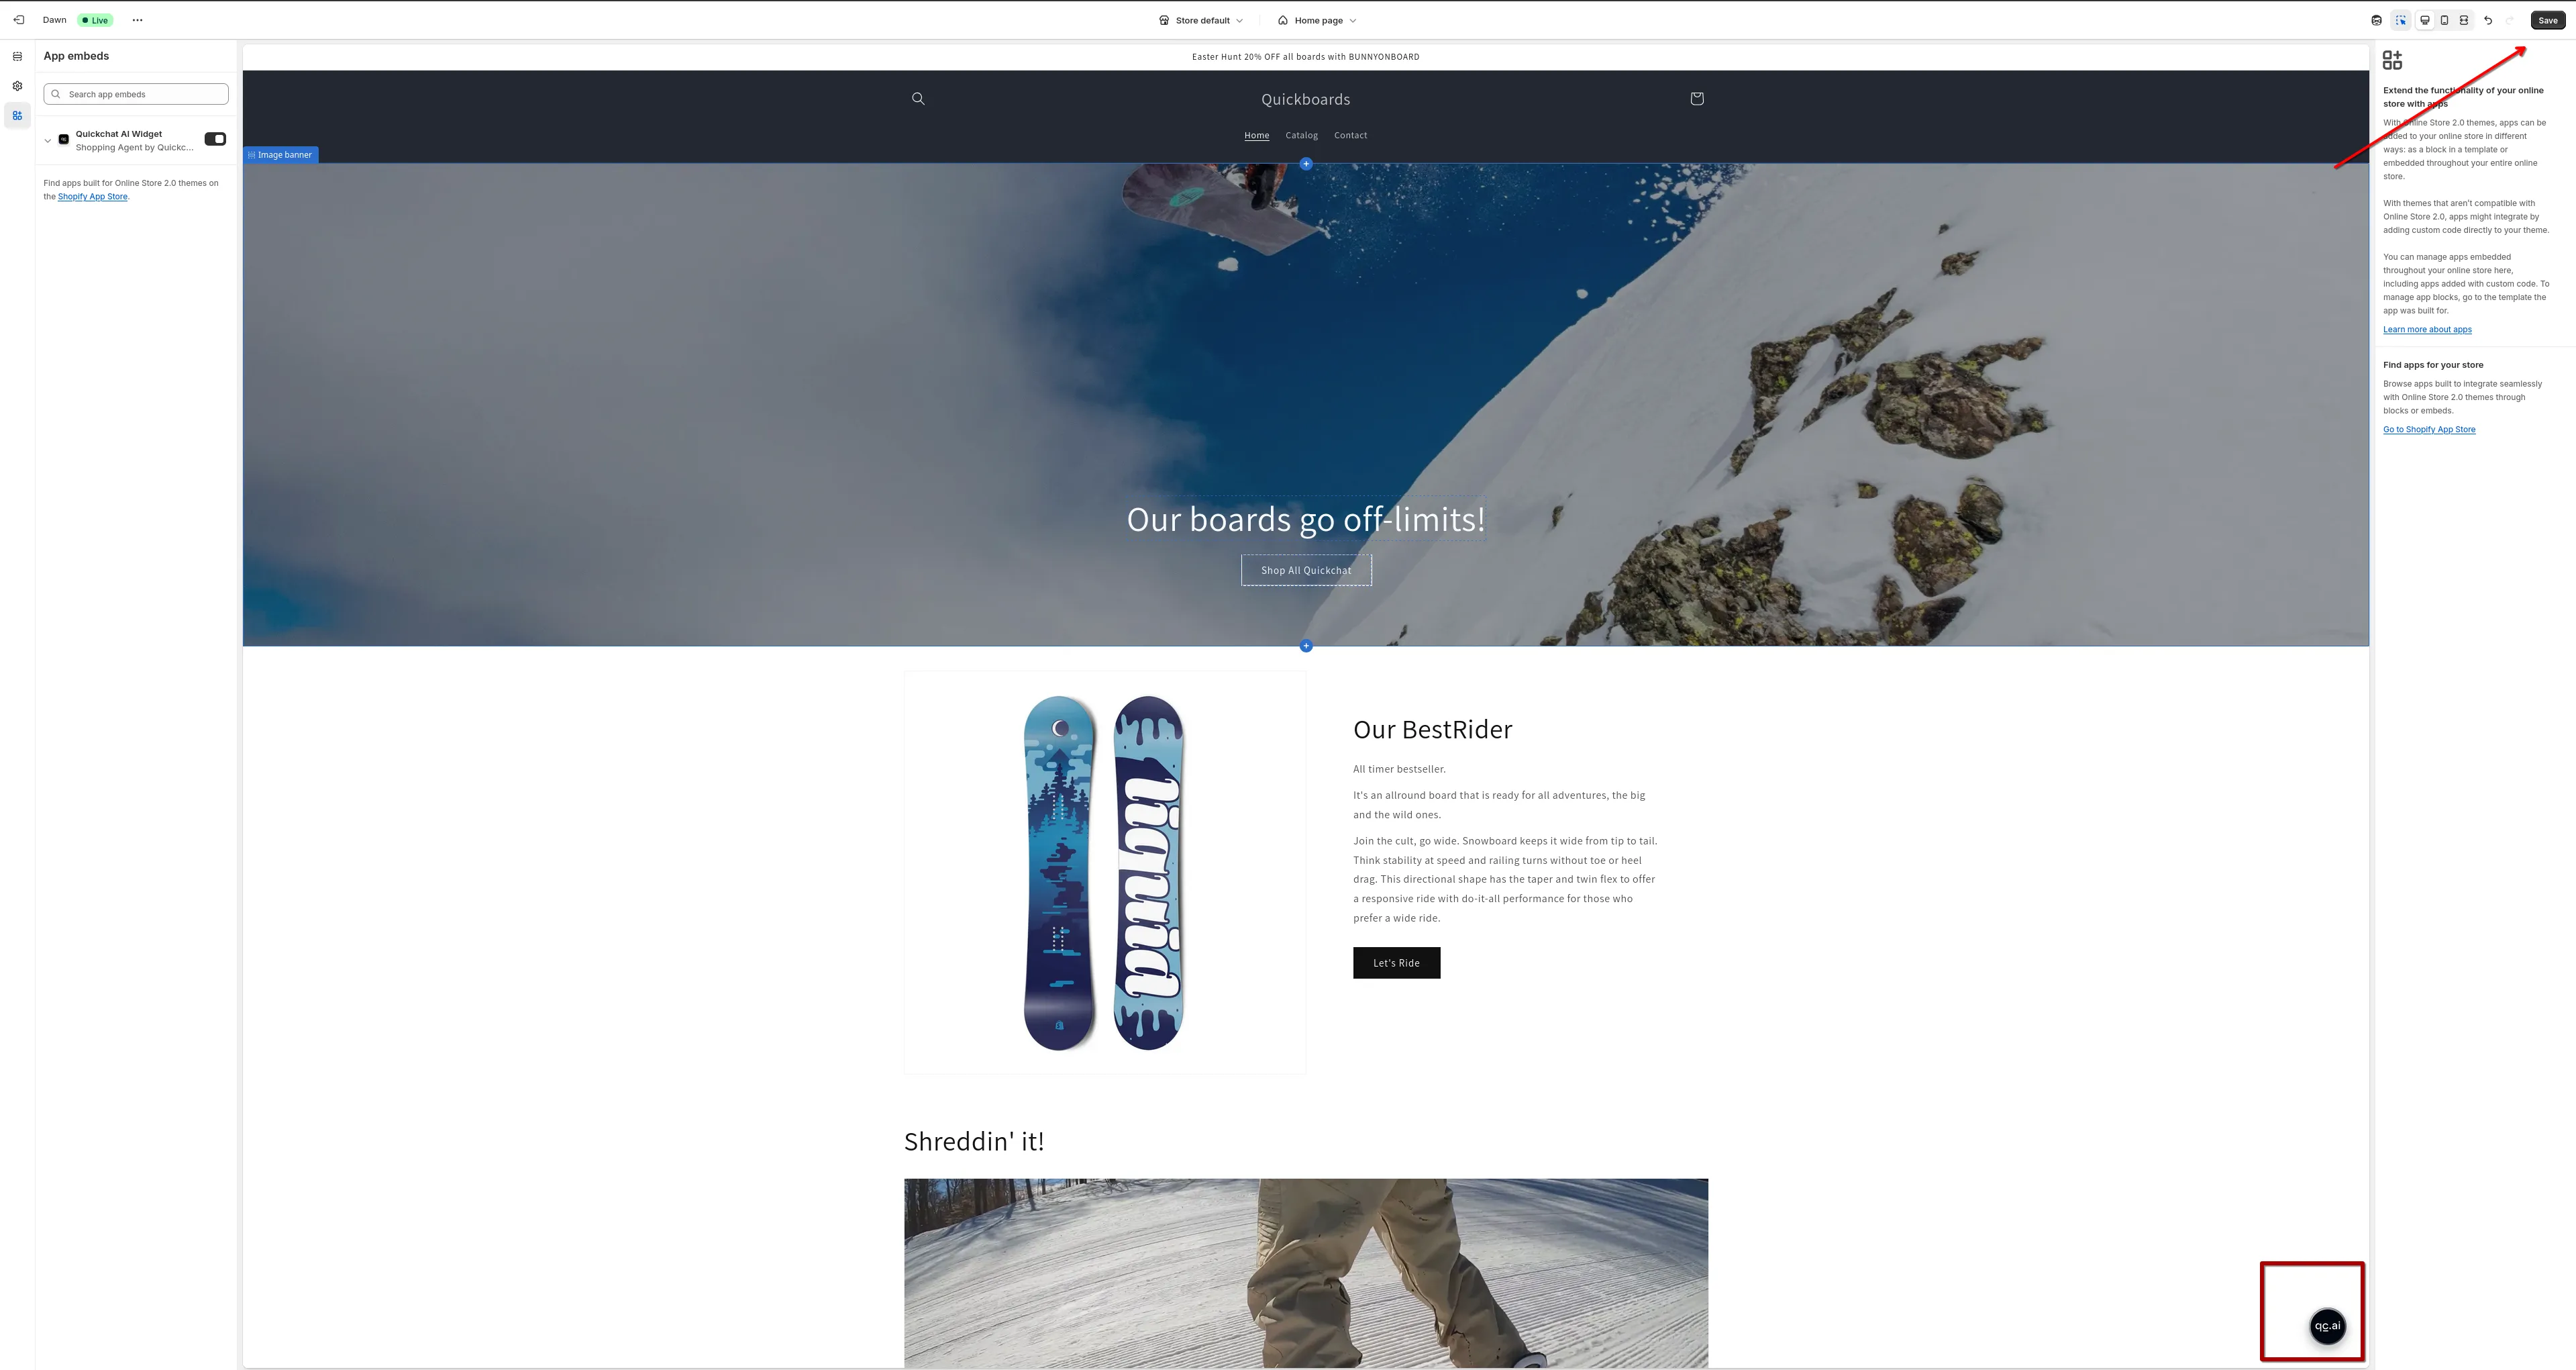
Then click Save (top-right).
Step 3: Confirm on your storefront
Open your storefront (preview or live site) and look for the Quickchat AI chat bubble in the corner of the page.
That’s it!
Quickchat AI Agent is live on your theme.
Optional tweaks
- Widget behavior & styling. Manage Agent behavior and branding from inside the Quickchat AI app. Go to Your website (left sidebar) → Appearance tab.